Single-board computers (SBC) are both inexpensive and reliable; they are also very small. As such they make excellent 24x7 home servers. This guide steps you through the process of creating such a server.
This guide was originally tested on a Raspberry Pi 400, and then later on a Raspberry Pi 4b. The main difference it that the Pi 400 board is embedded in a small keyboard.
I also have another SBC, an ODROID still running Ubuntu LTS 16.04, and I will document it as well when I update it. I am not sure yet whether I will document it here, or as another mini-document. For now I am focusing on the Raspberry Pi.
One of my goals is to promote using the command-line to do most of the work. If you are interested in expanding your horizons and understanding more about the power of the command-line, then this guide is for you. There is also a lot of detail in this guide; this is my personal preference. I grow tired of the current trend to provide internet-searched answers in a few phrases to fit on the screen of a mobile phone.
Take a look at the table of contents at the top of the document. Some users will only be interested in creating a 24x7 local file-sharing (Samba) service at home – in that case you do not need to read beyond the section on ‘Backups’.
Subsequent chapters are more complex, so an interest in the command-line is really needed. Of course, people familiar with Linux and the command-line will skip some sections of this guide.
You should look into assigning a permanent network IP address for your server in your home network so that you can easily connect to it from any of your devices. Your home network router/WiFi modem should have the option to enable you to reserve an IP address for any device. You only need to know the hardware MAC address of your future server. There will be 2 MAC addresses - one for hardwired ethernet and one for wireless. You can reserve both interfaces until you decide which way you will connect your server to your router.
// There are a few ways to find the MAC addresses of your network devices under
// contemporary Linux distributions.  One quick command-line method is to look
// in the '/sys/class/net/' sub-directory for the network devices:
$ ls  /sys/class/net/*/address
/sys/class/net/eth0/address  /sys/class/net/wlan0/address
/sys/class/net/lo/address

// On a Pi with Ubuntu installed the wired network device is 'eth0' and the
// wireless network device is 'wlan0'

$ cat /sys/class/net/eth0/address
e4:5f:01:a7:22:54

$ cat /sys/class/net/wlan0/address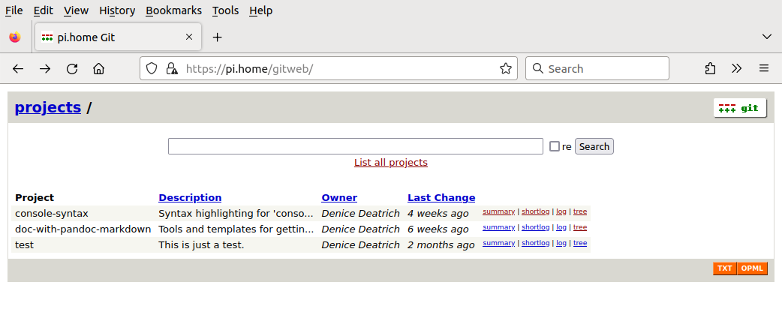
e4:5f:01:a7:22:55This guide was created in the Markdown markup language (the Pandoc flavour of Markdown). Markdown is wonderfully simple. Then, using the versatile Pandoc command set, both HTML and PDF formats of the document were generated. In fact this document was created using the home server as a remote desktop. The server served as a git, web and NFS server; as well it served as a remote desktop for contemporary documentation creation.
The appendix of this document is rather large. The idea is to push some of the command-line and technical detail into the appendix. Thus the flow of the document covers the basics, encouraging the reader to see the bigger picture and to avoid being smothered in the detail.
In this guide command-line sessions appear in a pale-yellow box, using a customized .console Markdown syntax highlighting convention which I created for command-line input and output. Two kinds of simplified command-line prompts appear. As well, explanatory comments starting with two slashes are coloured blue:
// Usually your prompt would be more complex, something like this:
//    myname@ubuntu:~/.vim/syntax$
// or like this:
//    [desktop /tmp]$
// But I simplify its appearance when illustrating command-line sessions.
// Normal Users' command-line prompt, coloured 'green':
$ some-command

// The root superuser's prompt, simplifed also, and coloured 'red':
# some-other-command
From my experience creating this guide I added another git repository containing the examples of the Markdown documentation style and support files used in this guide.
Sometimes command output is long and/or uninteresting in the context of this guide. I might show such segments with a ellipsis (…)
Sometimes a double-exclamation (!!) mark may appear somewhere – this is only a reminder for myself to fix an issue at that point in the documentation. These reminders will eventually disappear.
I tend to use ‘ssh’ as a verb - it is not really correct to do this, but it really is a verb in my life. So I apologize if it annoys you.
If you discover issues with instructions in this document, or have other comments or suggestions then you can contact me on my github project page.
Though many Raspberry Pi owners run the Raspberry Pi OS (formerly known as Raspbian), in this guide I chose to use Ubuntu. Ubuntu LTS is a long-term support Debian-based Linux OS. Ubuntu is renowned for its desktop support, but it also provides a comfortable home server experience.
A server should be stable. We want to apply software updates, but we also want to avoid the need to update the major version of the base OS every year. The Official Gnome LTS releases with the Gnome desktop environment in the main software repository are supported for up to 5 years from the time of the initial release, and for up to 10 years with extended security-only updates via Ubuntu Advantage access1, also known as Expanded Security Maintenance (ESM).
Without ESM not all repositories get the same level of support. For example, the community-supported desktop environments located in the universe software repository only get best-effort maintenance from Canonical and the Ubuntu community. Nonetheless, most critical services are installed from the base repository, and thus have excellent functional and security support.
However with an ESM/Advantage/Pro account, then all packages get security updates for 10 years from initial release. This change was introduced in January of 2023.
As with all OS distributions the versions of major software stay with the initial release, and patches to the software are for bugs and security issues for those software versions.
Generally you should think about upgrading your server OS every few years so that you stay in touch with current technologies, and so that you benefit from newer software versions.
At the time of writing this guide I used version 22.04 of Ubuntu LTS (also known as Jammy Jellyfish). It was first released in April 2022, as indicated by the release number.
If you are a going to be using Ubuntu then it is wise to subscribe to a few mailing lists. There are lots of them, but a few low volume ones like these are a good idea:
I also opt to use an installation image which uses the MATE desktop system – at the bottom of that linked website is a note about why it is called MATE (pronounced mat-ay). The MATE window manager is intuitive, efficient, skinny, dependable and popular. It is widely available on most flavours of Linux. MATE is not flashy, but it gets the job done.
Even though we are creating a home server, it is useful to configure the server to provide a remote graphical desktop environment – this is why in this guide we use the desktop image rather than the server image. Then you can use the desktop for fun, learning, or perhaps as your Linux development environment from other devices. Accessing the desktop remotely is also documented in this guide.
This installation image still uses the X.org display server instead of Wayland, partly because it uses MATE which is not yet ready for Wayland at this Ubuntu LTS release, and also because this build is for the Raspberry Pi, where Wayland support is new. Moreover remote desktop support is a work in progress for Wayland environments, and is better left to the X.org protocol for now.
You will need a new or repurposed microSD card with a capacity of at least 32 GB – since this is a server we might want to store lots of photos or videos on it. See the Ubuntu MATE website for some examples of microSD cards. Recently I was able to buy a 256 GB Silicon Power microSD card for less than $25 Cdn on Amazon; this brand is rated highly for use on Raspberry Pi’s by testers like Tom’s Hardware.
Go to the Ubuntu MATE download website to download your image - for a Pi 4 generation with 4 or more GB of RAM the 64-bit ARM architecture (arm64) is best. For the version I used in March 2023 the image name was:
ubuntu-mate-22.04-desktop-arm64+raspi.img.xz.
There are many instructions available online to help you download the disk image and install it onto installation media - I will not reproduce the instructions here. How you create the image depends on your home computing device and its OS. There is a helpful tutorial on creating the installation image using the Raspberry Pi Imager software for 3 operating systems:
After installing the disk image on the microSD the disk partitioning looks like this using the fdisk command. I show it here so that you are aware of what is going on under the hood. Here is an example of a 256 GB microSD inserted into a USB card reader on another Linux computer where the card showed up as /dev/sde:
$ sudo fdisk -l /dev/sde
Disk /dev/sde: 231.68 GiB, 248765218816 bytes, 485869568 sectors
Disk model: FCR-HS3       -3
...
Disklabel type: dos
Disk identifier: 0x11d94b9e

Device     Boot  Start      End  Sectors  Size Id Type
/dev/sde1  *      2048   499711   497664  243M  c W95 FAT32 (LBA)
/dev/sde2       499712 12969983 12470272  5.9G 83 Linux
There are 2 partitions; the first (/dev/sde1) is a small boot partition whose type is FAT32, and the second (/dev/sde2) is the minimal 6 GB Linux partition. Though this microSD is 256 GB, only the first 6 GB is currently used. The automatic installation process will expand the partition right to the maximum extend of its partition or of un-allocated space. Most Linux installation images allow you to choose your disk partitioning; the Raspberry Pi Ubuntu installation image does not.
However, it is possible and useful to modify the pre-installation partitioning directly on the microSD card as described in the appendix.
In the appendix I also provide a generic Linux command-line approach to downloading, un-compressing and writing the image to the microSD card. If you are not yet very familiar with the command-line then leave this exercise for a later time in your Linux adventure.
Once you have prepared your microSD card then insert it in your Raspberry Pi. Note that the card pushes in easily. It will only go in one way. On a Pi 400 you can eject it by gently pushing on it once and it will pop out enough to grab it. There is no need to pull on it to remove it because it essentially pops out. With a Pi 4b you will need to pull it out.
Turn the power on with the Pi connected to a monitor, USB keyboard and mouse. You will shortly see the firmware rainbow splash screen. Shortly after that there are a series of screens allowing you to customize the installation:
As the installation starts it will show some informational screens to entertain you while it installs. Eventually it will reboot and present you with the login screen. Once you login you will see the default MATE desktop configuration.
Before going further immediately update the software on the system. The MATE installation image is not released often, so it can be a bit behind the package update curve. As well, any final configuration issues will be updated.
Open a terminal window by selecting:
Application -> System Tools -> MATE Terminal
and enter the following commands:
// This will update the system's knowledge about what should be updated;
// in other works, the cache of software package names pending for update:
$ sudo apt update

// then update the software; the command is actually 'upgrade', which is odd,
// at least to me.. I like 'yum check-update' and 'yum update' much better...
$ sudo apt upgrade
It will take a while. Once finished there is one more update to do before you reboot the system – the Raspberry Pi bootloader EEPROM update, in case there are pending updates to apply:
// You can check the current state of firmware updates without being root.
// Here we see that the firmware is up-to-date, but the default bootloader
// could be set to use the latest firmware:
$ rpi-eeprom-update
*** UPDATE AVAILABLE ***
BOOTLOADER: update available
   CURRENT: Thu 29 Apr 16:11:25 UTC 2021 (1619712685)
    LATEST: Tue 25 Jan 14:30:41 UTC 2022 (1643121041)
   RELEASE: default (/lib/firmware/raspberrypi/bootloader/default)
            Use raspi-config to change the release.

  VL805_FW: Using bootloader EEPROM
     VL805: up to date
   CURRENT: 000138a1
    LATEST: 000138a1

// now we need to be root since we want to apply the update:
$ sudo rpi-eeprom-update -a
*** INSTALLING EEPROM UPDATES ***
...
EEPROM updates pending. Please reboot to apply the update.
To cancel a pending update run "sudo rpi-eeprom-update -r".
Now reboot the server to get the newer kernel, and to complete the firmware update. On the far upper right taskbar, select the power button icon, and then select Switch Off -> Restart.
For people without much command-line experience it is important to get going at the command-line. When logged into the MATE desktop open a terminal window by selecting Application -> System Tools -> MATE Terminal.
Try some command-line examples in the appendix. Note that the up/down arrow keys can be used to recall your previous commands. You can edit and reuse an entry in your previous commands using the left/right arrow keys.
You will find that the ‘TAB’ key (shown below as <TAB>) is very useful for command-line completion.
Suppose you are going to use the command ‘timedatectl’. You start by typing the word ‘time’ and then hit the TAB key once, then again when you do not get a response. You will see 4 possible commands as shown below. Then to complete the command simply type d followed by another TAB and the full command will complete:
$ time<TAB><TAB>
time         timedatectl  timeout      times
$ timed<TAB>
$ timedatectl
Look online for some tutorials; there are millions of results on Google if you search for:
Linux "command line" tutorial for beginnersSee also the list of all commands used in this guide.
There are many Ubuntu-specific tutorials. You might want to check out these two:
We are going to create a Samba file sharing service on our server. Other devices like mobile phones, tablets, laptops and desktops running a variety of operating systems should be able to manage files in the designated data area.
We are not going to be really secure, in that we are allowing guest access. Presumably if you let your family and your guests connect to your network, then you would allow them to connect to your Samba server.
But as always, your internal home network should be well protected with at least a strong password for your wireless SSID connections.
First, visit Setting Up a Data Area in the appendix to find out how to create your data area.
Always use a sub-directory inside the data area to begin any new project. One of the advantages is that the lost+found directory does not become part of your project. For this Samba project we will create /data/shared.
For Samba the top level ownership of the samba area will be a user named ‘nobody’. This user is always created in Linux systems and has no login shell, so ‘nobody’ cannot log in. It is a safer user identity to use for guest access to Samba shares.
We set the access permissions using chmod2 and chown3.
$ cd /data
$ sudo mkdir shared
$ sudo chown nobody:nogroup shared
$ sudo chmod g+ws shared
Here are 3 example directories to create for differing purposes:
‘Music’, ‘Protected’ and ‘Test’
other examples might be ‘Videos’ and ‘Pictures’:
You will be able to create directories inside the shared area using your other devices as well.
I use the Test area initially for testing from various devices; that is, create and delete files in the test directory.
$ cd /data/shared
$ sudo mkdir Test
$ sudo chown nobody:nogroup Test
$ sudo chmod g+ws Test
I like having a general ‘Protected’ area that others can access but cannot change. I use secure-shell access to that area for dumping files that I manage without using Samba tools.
$ cd /data/shared
$ sudo mkdir Protected
$ sudo chown myname:mygroup Protected
$ sudo chmod g+ws Protected
As an example I put my old Music files in ‘Music’ so that it could be accessed from various devices 24x7. You can either keep the permissions as nobody:nogroup, allowing other people in your home network to help manage the collection, or you can change ownership so that only you manage them locally. In this example my login name is ‘myname’ with group ‘mygroup’:
$ du -sh /data/shared/Music/
7.4G    /data/shared/Music/
$ ls -la /data/shared/Music/
drwxr-sr-x  9 myname mygroup   4096 Apr 15 16:03 .
drwxrwsr-x  7 nobody nogroup   4096 Feb 26 11:59 ..
-rw-r--r--  1 myname mygroup 108364 Feb 27  2022 all.m3u
drwxr-xr-x  9 myname mygroup   4096 Feb 26  2022 Celtic
-rw-r--r--  1 myname mygroup  13373 Mar  6  2022 Celtic.m3u
...
drwxr-xr-x  5 myname mygroup   4096 Feb 27  2022 Nostalgia
-rw-r--r--  1 myname mygroup   6145 Feb 27  2022 Nostalgia.m3u
drwxr-xr-x 13 myname mygroup   4096 Feb 26  2022 Pop
-rw-r--r--  1 myname mygroup  10065 Feb 27  2022 Pop.m3u
drwxr-xr-x 39 myname mygroup   4096 Feb 26  2022 Rock
-rw-r--r-- 1 myname mygroup 41656 Feb 27 2022 Rock.m3uSimply install the samba package; apt will pull in any dependencies:
$ sudo apt install samba
...
0 upgraded, 21 newly installed, 0 to remove and 3 not upgraded.
Need to get 7,870 kB of archives.
After this operation, 44.1 MB of additional disk space will be used.
Do you want to continue? [Y/n]
...The main configuration file is:
/etc/samba/smb.conf
The file is organized into sections:
Here are the specifics:
The modified smb.conf file is in github.
$ cd /etc/samba
$ sudo cp -p smb.conf smb.conf.orig
$ sudo nano smb.conf
// The 'diff' command shows differences in snippets with the line numbers
// A more elegant way to see the differences would be side-by-side:
//   diff --color=always -y smb.conf.orig smb.conf | less -r
$ diff smb.conf.orig smb.conf
29c29,30
<    workgroup = WORKGROUP
---
> #   workgroup = WORKGROUP
>    workgroup = LINUX
33a35,39
> # for Apple SMB clients
>    fruit:nfs_aces = no
>    fruit:aapl = yes
>    vfs objects = catia fruit streams_xattr
>
62a69,70
>    log level = 1 passdb:3 auth:3
>
241a250,259
>
> [home]
>     comment = Samba on Raspberry Pi
>     path = /data/shared
>     writable = yes
>     read only = no
>     browsable = yes
>     guest ok = yes
>     create mask = 0664
> directory mask = 0775$ sudo systemctl restart smbd nmbd
$ systemctl status smbd | grep Status:
Status: "smbd: ready to serve connections..."
$ systemctl status nmbd | grep Status:
Status: "nmbd: ready to serve connections..."
//
$ cd /var/log/samba
$ ls -ltr
total 2168
drwx------ 5 root root 4096 May 7 09:45 cores/
-rw-r--r-- 1 root root 369 May 7 10:03 log.desktop
-rw-r--r-- 1 root root 0 May 7 10:08 log.ubuntu
-rw-r--r-- 1 root root 9000 May 7 10:51 log.192.168.1.82
$ tail log.192.168.1.82
[2023/05/07 10:51:01.059310, 3] ../../source3/auth/auth.c:201(auth_check_ntlm_password)
check_ntlm_password: Checking password for unmapped user ... with the new password interface
[2023/05/07 10:51:01.059391, 3] ../../source3/auth/auth.c:204(auth_check_ntlm_password)
check_ntlm_password: mapped user is: [LINUX]\[guest]@[UBUNTU]Tests to run to validate functionality include the following:
Testing will depend on your device and client.
Suppose you have an Android phone. Download the App named Cx File Explorer from your App Store. Under its Network tab you can open a ‘remote’ Samba share in your home network. You enter in the IP address of the Pi server and select ‘Anonymous’ as the user instead of user/pass.
(!! get an example from Windows and from an iphone)
Suppose you have a MATE desktop session on your Pi server or on another Linux device. Open a file browser:
Applications -> Accessories -> Files
The Files browser ‘File’ menu has an option: Connect to Server. If you have an older version of Mate then find the help option and search for ‘Connect to Server’.
A small connection window pops up. It is a bit annoying, so select any options that allow the file browser to remember your entries, and also create a bookmark.
There is no Samba password for ‘guest’, but the connection window will want one anyway; so give it the password ‘guest’ to make it happy.
At this point an application named seahorse might pop up. It is the GNOME encryption interface, and you can store passwords and keys in it. I don’t use it, but you might want to for this Samba share. You can always cancel the seahorse window.
For the connection request, fill in this data:
and finally connect.
Always, always, do some kind of backups on your server. For system backups, very little actually needs to be backed up, yet it is important to get into a frame of mind where you think about these things. Let’s look at what you should back up on your server, and how you might do it.
There is no need to back up everything - you can always reinstall and reconfigure. This is my favourite list of system directories to back up:
If you are playing with database services then you need to inform yourself which directories and/or data exports should be added and/or used for backups. Note that when you have created a Samba or an NFS server you will have other data directories to back up, and these directories might be large.
A backup process and a link to an example backup script are in the appendix. We look at backing up both system and data directories, including the backup of large directories. Compressed system directories are typically small. But /home and /data/shared might be large. Be aware of your space needs, and adjust backups accordingly.
Recovering files from backups is fairly easy. It is best to use an empty directory with adequate space. In this example we recover files from compressed tar files. We unpack the tar files etc.tgz and home.tgz in the empty directory, and then move or copy any files into place in the file system. Example:
// This example unpacks home.tgz and etc.tgz.  Do this with sudo so that
// files are unpacked with the correct permissions.
$ sudo mkdir /var/local-recovery

// We can copy files from the local backup tree: /var/local-backups/
// or from the external drive once we mount it:  /mnt/backups/
// So use the needed pathname instead of '/path/to/' below:
$ sudo cp -ip /path/to/home.tgz /path/to/etc.tgz  /var/local-recovery/

$ cd /var/local-recovery
$ sudo tar -zxf etc.tgz
$ sudo tar -zxf home.tgz
$ sudo rm etc.tgz home.tgz
$ ls -l
drwxr-xr-x 152 root root 12288 Jun  1 10:56 etc
drwxr-xr-x   3 root root  4096 May 25 10:45 home
$ ls -l home/
drwxr-x--- 25 myname myname 4096 Jun  1 21:12 myname
If you need to recover files from large directory backups then you can copy the files directly from the removable media to your target directories. For large directory backups we do not compress the backed up files, since it takes some time and may introduce an additional disk space problem.
// This example recovers a directory inside the large directory backup of
// /home.  First mount the USB drive -- the example partition here is at
// /dev/sda1:
$ sudo mount /dev/sda1 /mnt
$ cd /mnt/rsyncs
$ ls
0  3  5  copy
$ cd 0/home/myname/
$ ls
bin  doc  downloads  etc  git  icons  inc  lib  src

// Since the files are my files then I do not need to use 'sudo'.
// Here I am recovering my 'bin' directory.
// Note that I copy it to a different directory name so that I have the
// option of comparing any existing 'bin' directory in my home.
$ cp -a bin ~/bin.recovered

// Change directories away from the USB drive so that you can unmount it.
// You cannot unmount a file system if you are parked in it:
$ cd
$ sudo umount /mnt
$ pwd
/home/myname
$ diff -r bin bin.recoveredHere is a list of tasks you can apply to your server for 24x7 service. Ubuntu installations are more common on laptops and desktops which are often connected via wireless, are turned on and off frequently, and have a lot of software configuration not usually present or needed on a server.
The main objective here is to show you some options that reduce complexity and memory consumption, and might improve security and reliability. You can always circle back here in the future and try them, or just try any one topic which interests you.
By all means, ignore all of this if you don’t want to be bothered with disabling extraneous software. I have spent 3 decades managing UNIX and Linux systems, so I can be a bit picky about what runs on my systems.
If you won’t be using it on your server then turn Bluetooth off.
The Pi does not have a BIOS like personal computers do; instead configuration changes to enable or disable devices are made in the configuration file config.txt in the directory /boot/firmware/
You will need to eventually reboot the server once you have made this change. If you also disable WiFi then wait until you have finished the next task, or any other tasks in this chapter.
// List bluetooth devices:
$ hcitool dev
Devices:
        hci0    E4:5F:01:A7:22:56

// disable bluetooth services running on the Pi
$ sudo systemctl disable blueman-mechanism bluetooth

// Always save a copy of the original file with the 'cp' command:
$ cd /boot/firmware
$ sudo cp -p config.txt config.txt.orig
// Disable bluetooth in config.txt by adding 'dtoverlay=disable-bt' at the end
$ sudo nano config.txt
// Use the 'tail' command to see the end of the file:
$ tail -3 config.txt

dtoverlay=disable-btIf you will use the built-in ethernet interface for networking on your server then turn WiFi off. I prefer wired connections for servers, especially since newer technology offers gigabit speed ethernet. In my experience, the network latency is usually better to wired devices. But if you prefer to keep the server on wireless then skip this task.
You will need to reboot the server once you have made this change, but remember to connect the ethernet cable on the Pi to your home router first!
// List wireless devices - after making this change you will not see this
// information:
$ iw dev
phy#0
        Unnamed/non-netdev interface
                wdev 0x2
                addr e6:5f:01:a7:71:0d
                type P2P-device
                txpower 31.00 dBm
        Interface wlan0
                ifindex 3
                wdev 0x1
                addr e4:5f:01:a7:22:55
                ssid MYNET
                type managed
                channel 104 (5520 MHz), width: 80 MHz, center1: 5530 MHz
                txpower 31.00 dBm

// Disable wireless in config.txt by adding 'dtoverlay=disable-wifi' at the end
$ cd /boot/firmware
$ sudo nano config.txt
// Use the 'tail' command to see the end of the file:
# tail -3 config.txt

dtoverlay=disable-bt
dtoverlay=disable-wifi

// After rebooting the Pi disable the wireless authentication service
$ sudo systemctl stop wpa_supplicant
$ sudo systemctl disable wpa_supplicantSBC’s like the Raspberry Pi do not have a real-time clock (RTC), whereas more complex systems like desktops and laptops do.
You can buy an RTC for the Pi, or you can install a package that fakes some of the functionality of a hardware clock:
$ sudo apt install fake-hwclock
...
Setting up fake-hwclock (0.12) ...
Created symlink /etc/systemd/system/sysinit.target.wants/fake-hwclock.service ...
update-rc.d: warning: start and stop actions are no longer supported; falling back to defaults

// The package complains about unsupported start/stop actions, so it does
// not start the fake clock; simply start it yourself:
$ systemctl status fake-hwclock
  fake-hwclock.service - Restore / save the current clock
     Loaded: loaded (/lib/systemd/system/fake-hwclock.service; enabled; vendor >
     Active: inactive (dead)
       Docs: man:fake-hwclock(8)
$ sudo systemctl start fake-hwclock
Without this package you will notice that the timestamps at startup are wildly wrong. For example when you look at snippets of the ‘last’ logged in users, the logs about reboots are always odd, but once you have installed the fake clock then reboot times are in line with real world time:
// without fake-hwclock:
$ last | less
...
myname   pts/1        desktop.home     Wed Jul 12 14:34 - 15:51  (01:17)
myname   pts/0        desktop.home     Wed Jul 12 14:28 - 14:46  (00:17)
reboot   system boot  5.15.0-1033-rasp Mon Mar 20 08:33 - 09:30 (115+00:56)
myname   pts/4        desktop.home     Tue Jul 11 18:13 - 23:44  (05:31)
myname   pts/2        desktop.home     Tue Jul 11 16:29 - 18:21  (01:52)
myname   pts/2        desktop.home     Tue Jul 11 16:10 - 16:24  (00:14)

// with fake-hwclock:
...
root     pts/0        ubuntu.home      Wed Jul 26 10:39   still logged in
reboot   system boot  5.15.0-1034-rasp Wed Jul 26 10:38   still running
myname   pts/2        desktop.home     Wed Jul 26 10:37 - 10:37  (00:00)
root     pts/1        ubuntu.home      Wed Jul 26 10:15 - down   (00:23)
myname pts/0 desktop.home Wed Jul 26 10:11 - 10:38 (00:27)Maybe like me you like seeing informational messages as a computer boots up. In that case you need to edit /boot/firmware/cmdline.txt and remove the quiet argument. On my system this one line file now ends in:
‘… fixrtc splash’
instead of
‘… fixrtc quiet splash’:
$ cd /boot/firmware
$ sudo cp -p cmdline.txt cmdline.txt.orig
$ sudo nano cmdline.txtSimpler is better for a server. Normally 24x7 servers are headless, mouseless, keyboardless, and sit in the semi-darkness. A graphics-based console is therefore useless. Though your home server might not be as lonely as a data centre server, you might want to try a text-based console:
$ sudo systemctl set-default multi-user
$ sudo systemctl stop display-manager

// If you do have a mouse and a screen attached then you can still make
// the mouse work in a text console login -- it can be useful.  At work
// I have sometimes used the mouse at a console switch to quickly copy and
// paste process numbers for the kill command.

$ sudo apt install gpm
$ sudo systemctl status gpmUbuntu promotes another kind of software packaging called Snaps (which includes an App store). Some users are not pleased with issues introduced by the underlying support software, and decide to delete Snap support from their systems. In my early testing of Ubuntu LTS 22.04 I also ran into the problem of firefox not able to start, and like others I traced it back to snap (firefox is installed from a Snap package).
My opinion is that ‘Snaps’ are not meant for a server environment, and so I remove the associated software. I certainly find it distasteful to have more than a dozen mounted loop devices cluttering up output of block device commands for a handful of snap packages. I would rather free up the memory footprint and inodes for other purposes.
But if you like ‘Snaps’ then skip to the next topic.
Here is a quick summary on removing Snap support, that is, all snap packages and the snapd daemon:
You should close firefox if it is running in a desktop setting. Then disable the snapd services and socket:
$ sudo systemctl disable snapd snapd.seeded snapd.socketList the Snap packages installed, and then delete them. Leave base and snapd packages until the end. As noted in Erica’s instructions remove packages one at a time and watch for messages warning about dependencies. This is my list of Snap packages; your list might be different depending on what you have installed:
$ snap list
Name                       Version           ...  Publisher      Notes
bare                       1.0               ...  canonical     base
core20                     20230404          ...  canonical     base
core22                     20230404          ...  canonical     base
firefox                    112.0.2-1         ...  mozilla       -
gnome-3-38-2004            0+git.6f39565     ...  canonical     -
gnome-42-2204              0+git.587e965     ...  canonical     -
gtk-common-themes          0.1-81-g442e511   ...  canonical     -
snapd                      2.59.2            ...  canonical     snapd
snapd-desktop-integration  0.9               ...  canonical     -
software-boutique          0+git.0fdcecc     ...  flexiondotorg classic
ubuntu-mate-pi             0+git.0f0bcdf     ...  ubuntu-mate   -
ubuntu-mate-welcome        22.04.0-a59036a6  ...  flexiondotorg classic

$ sudo snap remove firefox
$ sudo snap remove software-boutique
$ sudo snap remove ubuntu-mate-welcome
$ sudo snap remove ubuntu-mate-pi
$ sudo snap remove snapd-desktop-integration
$ sudo snap remove gtk-common-themes
$ sudo snap remove gnome-42-2204
$ sudo snap remove gnome-3-38-2004
$ sudo snap remove core22
$ sudo snap remove core20
$ sudo snap remove bare
$ sudo snap remove snapd

$ snap list
No snaps are installed yet. Try 'snap install hello-world'.Completely remove snapd and its cache files from the system.
$ sudo apt autoremove --purge snapd
$ sudo rm -rf /root/snap
$ rm -rf ~/snap
As well, you can clean up ‘PATH’ environment variables and remove ‘snap’ from them. I also take the opportunity to fix issues that bother me. I have never overly trusted binaries in /usr/local/ (having supported them in the old commercial UNIX world) so I either push those paths to the end, or I remove them. I know that all directories in /usr/local/ are empty anyway, so I remove them:
$ cd /etc
$ sudo cp -p environment environment.orig
$ sudo nano environment
$ diff environment.orig environment
1c1
< PATH="/usr/local/sbin:/usr/local/bin:/usr/sbin:...:/usr/local/games:/snap/bin"
---
> PATH="/usr/sbin:/usr/bin:/sbin:/bin:/usr/games"

$ sudo cp -p manpath.config manpath.config.orig
$ sudo nano manpath.config
$ diff manpath.config.orig manpath.config
22d21
< MANDATORY_MANPATH                     /usr/local/share/man
33,36d31
< MANPATH_MAP   /usr/local/bin          /usr/local/man
< MANPATH_MAP   /usr/local/bin          /usr/local/share/man
< MANPATH_MAP   /usr/local/sbin         /usr/local/man
< MANPATH_MAP   /usr/local/sbin         /usr/local/share/man
68,69d62
< MANDB_MAP     /usr/local/man          /var/cache/man/oldlocal
< MANDB_MAP     /usr/local/share/man    /var/cache/man/local
72d64
< MANDB_MAP     /snap/man               /var/cache/man/snap
Then add configuration files for apt access to firefox dpkg-based packages. Finally install firefox from the Mozilla Personal Package Archive (PPA):
// Create the necessary apt configurations for firefox:

$ sudo nano /etc/apt/preferences.d/firefox-no-snap
$ cat /etc/apt/preferences.d/firefox-no-snap
Package: firefox*
Pin: release o=Ubuntu*
Pin-Priority: -1

$ sudo add-apt-repository ppa:mozillateam/ppa
...
PPA publishes dbgsym, you may need to include 'main/debug' component
Repository: 'deb https://ppa.launchpadcontent.net/.../ppa/ubuntu/ jammy main'
Description:
Mozilla Team's Firefox stable + 102 ESR and Thunderbird 102 stable builds
Support for Ubuntu 16.04 ESM is included.
...

// Install firefox
$ sudo apt install firefoxThere is a big 1 GB swapfile in the root of the file system - I find that offensive, so I moved it. If you are not as easily offended as I am then skip this topic.
It is a good idea to have some kind of swap enabled, since swap is only used if too much memory is being consumed by processes. Once memory is low the system will start using any configured swap on disk. Of course this is slower than memory, but it is better to use some swap at those moments instead of having an unfortunate process die because of an out-of-memory condition.
Over time if you never see swap being used then you could turn swap off and delete the swap file.
Here we create another 1 GB file – it can be much larger if needed; but if you need a lot of swap then you should investigate to see what is eating memory.
// check to see what the current swap usage is; in this case it is 0
$ free -t
           total       used        free    shared  buff/cache   available
Mem:     3881060     176900     3022600      5332      681560     3541748
Swap:    1048572          0     1048572
Total:   4929632     176900     4071172

// Look at what systemd does with swap, and turn off the appropriate items
$ systemctl list-unit-files | grep swap
mkswap.service                              disabled        enabled
swapfile.swap                               static          -
swap.target                                 static          -

// There will be a .swap rule for every swap file - this one is for /swapfile
// and we want to get rid of it
$ sudo systemctl mask swapfile.swap
Created symlink /etc/systemd/system/swapfile.swap → /dev/null.

// Even though the 'mkswap' service is by default disabled, I also
// mask it so that it doesn't come back from the dead - because it
// will come back if you don't also mask that service
$ sudo systemctl mask mkswap.service
Created symlink /etc/systemd/system/mkswap.service → /dev/null.

// turn current swap off so we can delete the old file
$ sudo swapoff -a
$ sudo rm /swapfile

// Create an new swapfile in a subdirectory
$ sudo mkdir /swap
$ sudo fallocate -l 1G /swap/swapfile
$ sudo mkswap /swap/swapfile
Setting up swapspace version 1, size = 1024 MiB (1073737728 bytes)
no label, UUID=3e64d157-6f09-48d1-94c2-3851b82a73b7

// Protect the swap file and add it to /etc/fstab
$ sudo chmod 600 /swap/swapfile
$ sudo nano /etc/fstab
$ grep swap /etc/fstab
/swap/swapfile    none           swap defaults     0 0

// Turn swap back on and check
$ sudo swapon -a
$ swapon
NAME           TYPE  SIZE USED PRIO
/swap/swapfile file 1024M   0B   -2

// Note that systemd will show a new 'swap' type named 'swap-swapfile.swap'
$ systemctl --type swap
  UNIT               LOAD   ACTIVE SUB    DESCRIPTION
swap-swapfile.swap loaded active active /swap/swapfileUNIX and Linux has a mechanism called cron allowing servers to run commands at specific times and days. However personal and mobile computing is typically not powered on all the time. So operating systems like Linux have another mechanism called anacron which tries to run periodic cron-configured commands while the computer is still running. Since we are creating a 24x7 server we do not also need anacron – delete it:
$ sudo apt remove anacron
$ sudo apt purge anacronHere are some services which normally can be disabled. Of course, if any of these services are interesting to you then keep them. Note that server processes are sometimes called daemons.
The systemctl command can handle multiple services at the same time, but doing them individually allows you to watch for any feedback. You can also simply disable these services without stopping them. They will not run on the next reboot.
// If you want to run a series of commands as root you can sudo to the bash
// shell, run your commands, and then exit the shell.  Be careful to
// always exit immediately after running your commands.
$ sudo /bin/bash

// disable serial and bluetooth modems or serial devices
# systemctl stop ModemManager
# systemctl disable ModemManager
# systemctl stop hciuart
# systemctl disable hciuart

// disable VPN and printing services - you can print without running
// a local printer daemon (!!maybe document using one though )
# systemctl stop openvpn
# systemctl disable openvpn
# systemctl stop cups-browsed cups
# systemctl disable cups-browsed cupsNote that it is possible to enable some form of secure boot with OTP (One Time Programmable Memory) on a Raspberry Pi 4, but it is not yet for the faint of heart.
// disable System Security Services Daemon (sssd) if you don't need it
# systemctl disable sssd

// Disable UEFI Secure Boot (secureboot-db)
// To be sure, install mokutil and take a look:

# apt install mokutil
# man mokutil
// --sb-state means:  Show SecureBoot State
# mokutil --sb-state
EFI variables are not supported on this system

# systemctl status secureboot-db
- secureboot-db.service - Secure Boot updates for DB and DBX
     Loaded: loaded (/lib/systemd/system/secureboot-db.service; enabled; vendor>
     Active: inactive (dead)

# systemctl disable secureboot-db
# apt autoremove --purge secureboot-db

// disable whoopsie and kerneloops if you don't want to be sending
// information to outside entities
# systemctl stop kerneloops
# systemctl disable kerneloops
# systemctl stop whoopsie
# systemctl disable whoopsie
# apt remove whoopsie kerneloops
# apt purge whoopsie kerneloops

// If you want to disable other apport-based crash reporting then remove apport
// from your server:
# apt autoremove --purge apport

// Apparmor (like SELinux) provides another layer of security to systems.
// If you are new to Linux you should keep it around to learn about it.
// For a home server I think it can be disabled; you must previously have
// removed 'Snaps':
# aa-status
apparmor module is loaded.
50 profiles are loaded.
41 profiles are in enforce mode.
...
# aa-teardown
Unloading AppArmor profiles

# aa-status
apparmor module is loaded.

# systemctl disable apparmor
...
Removed /etc/systemd/system/sysinit.target.wants/apparmor.service.

# apt autoremove --purge apparmor
dpkg: warning:  directory '/etc/apparmor.d/abstractions/ubuntu-browsers.d'
 not empty so not removed

# cd /etc
root@pi:/etc# mv apparmor.d apparmor.d.oldIf you prefer to see time in 24 hour format, or if you prefer to tweak other locale settings, then use localectl to set global locale settings.
In this example the locale setting is generic English with a region code for Canada. Because the British English locale uses a 24 hour clock then changing only the time locale will show datestrings with a 24 hour clock:
// Show your current locale settings
$ locale
LANG=en_CA.UTF-8
LANGUAGE=en_CA:en
LC_CTYPE="en_CA.UTF-8"
LC_NUMERIC="en_CA.UTF-8"
LC_TIME=en_CA.UTF-8
LC_TIME=en_GB.UTF-8
...

// What the date is in the current (Canadian) locale
$ date
Thu 11 May 2023 08:43:57 AM MDT

// What the date would look like if (American) en_US.UTF-8 were used:
$ LC_TIME=en_US.UTF-8 date
Thu May 11 08:45:18 AM MDT 2023

// What the date would look like if (British) en_GB.UTF-8 were used:
$ LC_TIME=en_GB.UTF-8 date
Thu 11 May 08:44:00 MDT 2023

// Change it to the British style.  The change is immediate, but since
// you inherit the older locale environment at login, then you will not see
// the change until you logout, and then back in.
$ sudo localectl set-locale LC_TIME="en_GB.UTF-8"Ubuntu installs a log rotation package which controls how log files are rotated on your server. This package typically once a week compresses log files to a different name in /var/log/ and truncates the current log. The resulting files are rotated through a specified rotation, and the oldest compressed log is deleted; for example here are 4 weeks worth of rotated auth.log files:
$ ls -ltr /var/log/ | grep auth.log
-rw-r-----  1 syslog     adm      3498 Apr 15 23:17 auth.log.4.gz
-rw-r-----  1 syslog     adm      8178 Apr 22 23:17 auth.log.3.gz
-rw-r-----  1 syslog     adm      7225 Apr 30 01:09 auth.log.2.gz
-rw-r-----  1 syslog     adm     58810 May  7 00:22 auth.log.1
-rw-r-----  1 syslog     adm     46426 May 11 09:17 auth.log
A better scheme is to use the ‘dateext’ option in /etc/logrotate.conf so that older compressed logs keep their compressed and dated names until they are deleted:
$ ls -ltr /var/log/ | grep auth.log
-rw-r----- 1 syslog      adm      3287 Apr 17 07:30 auth.log-20230417.gz
-rw-r----- 1 syslog      adm      2494 Apr 23 07:30 auth.log-20230423.gz
-rw-r----- 1 syslog      adm      4495 May  1 07:30 auth.log-20230501.gz
-rw-r----- 1 syslog      adm     35715 May  7 07:30 auth.log-20230507
-rw-r----- 1 syslog      adm     29500 May 11 09:55 auth.log
To make this change /etc/logrotate.conf is modified. We also set the number of rotations to keep to 12 weeks instead of 4 weeks. Note that per-service log file customization is possible; look at examples in /etc/logrotate.d/
$ cd /etc
$ sudo cp -p logrotate.conf logrotate.conf.orig
$ sudo nano logrotate.conf
$ diff logrotate.conf.orig logrotate.conf
13c13,14
< rotate 4
---
> #rotate 4
> rotate 12
19c20
< #dateext
---
> dateextNormally you get your network configuration from your home router via its DHCP service. If you are using a wired connection then consider statically configuring the IP address information on your server – there is a description of the process in the appendix in case you want to see how it is done.
By default the unattended-upgrades package is installed on Ubuntu LTS, and it is configured to run in an unattended manner. Its configuration files are in /etc/apt/apt.conf.d/, and the log files are in /var/log/unattended-upgrades/.
In particular the log files /var/log/unattended-upgrades-dpkg.log* contain the list of all upgraded packages:
// list files in time reverse order, then for each file find the date & package
$ ls -tr unattended-upgrades-dpkg.log* | \
  while read f ; do \
    echo "Log File $f:" \
    zegrep '^Log started:|^Unpacking ' $f \
    echo ""; \
  done

Log File unattended-upgrades-dpkg.log.1.gz:
Log started: 2023-05-10  06:05:40
Unpacking librados2 (17.2.5-0ubuntu0.22.04.3) over (17.2.5-0ubuntu0.22.04.2) ...
Log started: 2023-05-10  06:05:52
Unpacking libcephfs2 (17.2.5-0ubuntu0.22.04.3) over (17.2.5-0ubuntu0.22.04.2) ...
Log started: 2023-05-10  06:06:03
Unpacking libfreetype6:arm64 (2.11.1+dfsg-1ubuntu0.2) over (2.11.1+dfsg-1ubuntu0.1) ...

Log File unattended-upgrades-dpkg.log-20230601.gz:
Log started: 2023-05-12  06:40:40
Unpacking linux-modules-5.15.0-1028-raspi (5.15.0-1028.30) ...
Unpacking linux-image-5.15.0-1028-raspi (5.15.0-1028.30) ...
Unpacking linux-modules-extra-5.15.0-1028-raspi (5.15.0-1028.30) ...
Unpacking linux-modules-extra-raspi (5.15.0.1028.25) over (5.15.0.1027.24) ...
Log started: 2023-05-12  06:42:58
Unpacking linux-image-raspi (5.15.0.1028.25) over (5.15.0.1027.24) ...
Log started: 2023-05-12  06:43:10
Log started: 2023-05-17  06:28:44
Unpacking linux-libc-dev:arm64 (5.15.0-72.79) over (5.15.0-71.78) ...
...
If you are accustomed to monitoring and applying patches yourself, then you can delete the automatic update infrastructure, and do the patching yourself. Many work-place servers cannot be automatically updated without some risk, so if you support Linux at work you are probably used to configuring and managing your own software update policy.
If you decide to manage updates yourself then you could remove this package and its components. Of course, you should not do this until you are sure that you will follow through with doing your own updates:
$ systemctl status unattended-upgrades
     Loaded: loaded (/lib/systemd/system/unattended-upgrades.service; enabled
...
$ sudo apt remove update-notifier-common unattended-upgrades
...
The following packages will be REMOVED:
  ubuntu-release-upgrader-gtk unattended-upgrades update-manager update-notifier
  update-notifier-common
...

$ sudo systemctl disable apt-daily-upgrade.timer apt-daily.timer
Removed /etc/systemd/system/timers.target.wants/apt-daily.timer.
Removed /etc/systemd/system/timers.target.wants/apt-daily-upgrade.timer.Regardless of whether you have registered for and configured the free ESM update program or not, you might get tired of seeing your terminal windows with any kind of messages.
One way to get rid of messages is to comment out these message properties in PAM (Pluggable Authentication Modules) configuration files. In the example session below I comment out dynamic motd (message of the day) and last login messages in 2 modules: sshd and login
$ cd /etc/pam.d
$ sudo cp -p sshd sshd.orig
// comment out the dynamic motd configuration
$ sudo nano sshd
$ diff sshd.orig sshd
33c33
< session    optional     pam_motd.so  motd=/run/motd.dynamic
---
> #session    optional     pam_motd.so  motd=/run/motd.dynamic

$ sudo cp -p login login.orig
// comment out the dynamic motd configuration and the last login configuration
$ sudo nano login
$ diff login.orig login
33c33
< session    optional   pam_motd.so motd=/run/motd.dynamic
---
> #session    optional   pam_motd.so motd=/run/motd.dynamic
82c82
< session    optional   pam_lastlog.so
---
> #session    optional   pam_lastlog.so

// For sshd, you need to edit /etc/ssh/sshd_config and set 'PrintLastLog' to no
// We won't do that here; instead we will do it in the secure-shell chapter.
The other kind of optional pam session type of motd will still be displayed in your terminal window whenever you create a file named /etc/motd, since we did not comment it out.
$ grep -h motd /etc/pam.d/login /etc/pam.d/login | grep -v '^#'
session    optional   pam_motd.so noupdate
session    optional   pam_motd.so noupdate
It is unlikely that you will create a message that way for yourself. However, it is an interesting idea to drop an information file named /etc/motd on your server if your daily backups fail …
// Somewhere in your script you have:
echo "Your backups failed at `date`" >>/etc/motd

// then when you log in the next day:
$ ssh pi.home
Your backups failed at Fri 28 Jul 01:19:45 MDT 2023 The Secure Shell daemon, sshd, is a very useful and important service for connecting between computers near or far. If you are never going to connect via SSH into your Pi home server from within your network then do NOT install the daemon. You can always use the secure shell client, ssh, to initiate a connection to some external server – for that you do not need sshd.
If you will be needing sshd then first install it, since it is not installed by default in the LTS desktop version:
$ sudo apt install openssh-serverIf you will be using ssh to connect to any local Linux systems, then think about configuring your local area network (LAN) to suit your taste. There is an explanation in the appendix.
There are some sshd configuration issues that I like to fix in the secure shell daemon’s configuration file: /etc/ssh/sshd_config. The issues to fix are:
$ cd /etc/ssh
$ sudo cp -p sshd_config sshd_config.orig

// edit the file:
$ sudo nano sshd_config

$ diff sshd_config.orig sshd_config
15a16
> AddressFamily inet
95a97
> PrintLastLog no
101a104
> UseDNS yes
122a126,131
>
> # Limit access to root user; only local users can connect via ssh
> # to the root user, but only if root's authorized_keys file allows them.
> # note: using @localhost does not work on ubuntu unless you set 'UseDNS' to yes
> AllowUsers    myname@192.168.1.* *@localhost
>

// Another option is to also allow root access to this server from your Linux
// desktop (eg: 192.168.1.65).  Then the 'AllowUsers' configuration would
// look like this:
AllowUsers myname@192.168.1.* root@192.168.1.65 *@localhostIf you use the Linux command-line for work between computers you soon understand the usefulness of ssh. Here we go through the exercise of creating an ssh key pair so that you can connect securely between devices.
We use ssh-keygen to create the key pair. You should treat the private key carefully, distributing it to your desktop systems only. You can copy your public key to remote hosts, where you create an authorized_keys file that specifies which public keys are allowed to connect without using a standard system password.
Over time the Secure Shell key types have changed. Some key types are no longer considered secure, like SSH-1 or DSA keys. Here we will use an SSH RSA-based key with a key size of 4096 bits. Always use a strong passphrase. It is not like a password since you have more liberty to use combinations of characters; as the man-page on ssh-keygen says:
A passphrase is similar to a password, except it can be a phrase with a series of words, punctuation, numbers, whitespace, or any string of characters you want.
I would not create a passphrase that is less than 16 characters; I would certainly never set an empty passphrase.
// If you do not yet have a .ssh directory in your home directory then
// create one now; and give access to yourself only:

$ cd
$ mkdir .ssh
$ chmod 700 .ssh

// Generate the key:
$ ssh-keygen -t rsa -b 4096
Generating public/private rsa key pair.
Enter file in which to save the key (/home/myname/.ssh/id_rsa):
Enter passphrase (empty for no passphrase):
Enter same passphrase again:
Your identification has been saved in /home/myname/.ssh/id_rsa.

// The private key is named 'id_rsa' and the public key is named 'id_rsa.pub'
// Note the permissions of these 2 files; the private key is protected
// and is read-write only to the owner.
$ ls -l ~/.ssh/id_rsa ~/.ssh/id_rsa.pub
-rw------- 1 myname myname 3326 May  2 22:34 /home/myname/.ssh/id_rsa
-rw-r--r-- 1 myname myname  746 May  2 22:34 /home/myname/.ssh/id_rsa.pub
Be sure to back-up important directories like $HOME/.ssh – in your home environment it might not seem important, but once you start using your ssh keys for access to external resources then you should follow good practices. If you lose the private key then you will need to generate a new key pair.
Suppose you created your keys on your desktop, and you want to use them to ssh to your Linux home server without using a standard password. To do this you create an authorized keys file on the server:
// secure-copy your public key to the linux server (assuming the server is named 'pi')
$ scp ~/.ssh/id_rsa.pub myname@pi:~/
The authenticity of host 'pi (192.168.1.90)' can't be established.
ECDSA key fingerprint is SHA256:iP...
ECDSA key fingerprint is MD5:79:54:...
Are you sure you want to continue connecting (yes/no)? yes
Warning: Permanently added 'pi,192.168.1.90' (ECDSA) to the list of known hosts.

// On the server create your authorized_keys file if it does not exist
// inside '~/.ssh', and then 'cat' your public key to the end of the file.
// The authorized_keys file should always be protected.

$ ssh myname@pi
myname@pi's password:
$ mkdir ~/.ssh
$ chmod 700 ~/.ssh
$ cd ~/.ssh
$ touch authorized_keys
$ chmod 600 authorized_keys
$ cat /path/to/id_rsa.pub >> authorized_keys
$ tail -1 authorized_keys
ssh-rsa AAAAB3...6oLYnLx5d myname@somewhere.com
$ rm /path/to/id_rsa.pub
// logout from the server session
$ exit

// Back on the desktop verify that you can ssh into the server using only
// the key's passphrase (and not your password):
$ ssh myname@pi
Enter passphrase for key '/home/myname/.ssh/id_rsa':
Welcome to Ubuntu 22.04.2 LTS (GNU/Linux 5.15.0-1027-raspi aarch64)
...
$ exit

// If you want to only allow ssh access to your account from a specific
// computer in your LAN, than limit the hosts which are allowed by using
// the 'from=' option.  Edit the authorized_keys file and prepend the
// 'from=' option like this:
$ pwd
/home/myname/.ssh
// allow from host with IP address 192.168.1.65, and from localhost:
$ nano authorized_keys
$ tail -1 authorized_keys
from="192.168.1.65" ssh-rsa AAAAB3...6oLYnLx5d myname@somewhere.comThe goal here is to start an SSH agent on your desktop, and add your key(s) to the agent.
With a few tweaks we allow other programs to inherit the ssh-agent environment variables and we avoid entering passwords and passphrases throughout the day, or until you logout, reboot or turn off your desktop.
Download the shell script named prime-ssh-keys.sh to start the agent. The script saves the environment variables in a file named:
~/.ssh-agent-info-YOUR-FULL-HOSTNAME
// Copy the shell script to your home 'bin' directory; create it if needed:
$ cd
$ mkdir bin
$ cp /path/to/prime-ssh-keys.sh ~/bin/
$ chmod 755 ~/bin/prime-ssh-keys.sh

// Run the script:
$ ~/bin/prime-ssh-keys.sh
Enter passphrase for /home/myname/.ssh/id_rsa:
Identity added: /home/myname/.ssh/id_rsa (/home/myname/.ssh/id_rsa)

// This file sets and exports environment variables for the socket and the PID:
$ cat ~/.ssh-agent-info-desktop.home
SSH_AUTH_SOCK=/tmp/ssh-XXXXXXxRlqsm/agent.21324; export SSH_AUTH_SOCK;
SSH_AGENT_PID=21325; export SSH_AGENT_PID;

// Now if you 'source' the agent file to inherit the environment variables
//  you will be able to ssh into the linux server without using
//  a password or passphrase:
$ . ~/.ssh-agent-info-desktop.home
$ ssh -Y pi.home
Welcome to Ubuntu 22.04.2 LTS (GNU/Linux 5.15.0-1027-raspi aarch64)
...
Last login: Thu May 11 23:56:17 2023 from desktop.home
$ In a MATE desktop setting, you can add startup programs that run as soon as you log into your desktop. You can find the startup options in:
Menus -> System -> Preferences -> Personal -> Startup Applications
Create and add the script – it will open a temporary terminal window asking for the passphrase(s) for your key(s). The terminal window can be any terminal the allows you to run a shell script as an argument. You can use mate-terminal, or if you have installed the xterm package then you can use xterm. Note that the script invokes a shell (/bin/sh is a symbolic link to /bin/bash, and starts with a shebang)
// make the 'bin' directory if it does not exist:
$ cd
$ touch ~/bin/exec-prime-ssh-keys.sh
$ chmod 755 ~/bin/exec-prime-ssh-keys.sh
$ nano ~/bin/exec-prime-ssh-keys.sh
$ cat ~/bin/exec-prime-ssh-keys.sh
#!/bin/sh

#Decide which terminal command you will use:
exec mate-terminal -e /home/myname/bin/prime-ssh-keys.sh & 2>/dev/null
#exec xterm -u8 -e /home/myname/bin/prime-ssh-keys.sh & 2>/dev/null
Another useful tactic is to get your personal bash shell configuration file to inherit the SSH agent’s environment variables. Create a small script named ~/.bash_ssh_env which provides the variables. You can process that file in your ~/.bashrc file so that any new terminal window you launch will always inherit the variables. As well, other scripts which might need the variables can do the same.
// First create .bash_ssh_env; we 'cat' it after to show what it contains:
$ nano ~/.bash_ssh_env
$ cat ~/.bash_ssh_env

ssh_info_file=$HOME/.ssh-agent-info-`/usr/bin/hostname`
if [ -f $ssh_info_file ] ; then
  . $ssh_info_file
fi

// Then source ~/.bash_ssh_env inside your .bashrc file by simply including
// the following line in ~/.bashrc:

. ~/.bash_ssh_envYou can configure some personal preferences in a configuration file named $HOME/.ssh/config
I have a few favourite settings which have solved issues I have encountered in the past (like setting KeepAlive and ServerAliveInterval). A new favourite is setting HashKnownHosts to no. I like seeing the name of hosts I have connected to in ~/.ssh/known_hosts. Debian/Ubuntu set globally the HashKnownHosts value to yes. The result is that you can no longer see hostnames or IP addresses in your known_hosts file because they have been ‘hashed’.`
This is also where you can assign customized per-host ssh key pair filenames to particular hosts.
// Create and edit your ssh config file:
$ cd ~/.ssh/
$ touch config
$ chmod 600 config
$ nano config
$ cat config
## see:  man ssh_config

## ssh configuration data is parsed in the following order:
##         1.   command-line options
##         2.   user's configuration file (~/.ssh/config)
##         3.   system-wide configuration file (/etc/ssh/ssh_config)
## Any configuration value is only changed the first time it is seen.
## Therefore this file overrides system-wide defaults.

Host *
   KeepAlive yes
   ServerAliveInterval 60
   HashKnownHosts no

## Example private key which has a customized key name for github.com
Host github.com
IdentityFile ~/.ssh/id_rsa_githubIn case you have various devices at home that you would like to use in a Linux desktop fashion, but you do not want to change the current environment on those devices, then you can configure your home Linux server to provide that opportunity.
For all remote desktop options, first create an .Xsession file in your home directory on the server and configure it to start a MATE desktop session:
$ cd
$ nano .Xsession
$ cat .Xsession
/usr/bin/mate-sessionMost operating systems have client support for Microsoft’s Remote Desktop Protocol. On Linux there is also a software package named xrdp which can provide RDP.
Note that RDP is typically not really secure without adding some additional security features. However, from within your home network xrdp is okay.
We install xrdp, tweak the configuration a little, and restart xrdp:
$ sudo apt install xrdp
...
The following additional packages will be installed:
  xorgxrdp
...
Setting up xrdp (0.9.17-2ubuntu2) ...

Generating 2048 bit rsa key...

ssl_gen_key_xrdp1 ok

saving to /etc/xrdp/rsakeys.ini

Created symlink /etc/systemd/system/multi-user.target.wants/xrdp-sesman.service ...
Created symlink /etc/systemd/system/multi-user.target.wants/xrdp.service ...
Setting up xorgxrdp (1:0.2.17-1build1) ...
...

// The configuration file is xrdp.ini; here we disable ipv6 by stipulating
// 'tcp://:3389' in the port configuration:
$ cd /etc/xrdp
$ sudo cp -p xrdp.ini xrdp.ini.orig
$ sudo nano xrdp.ini
$ diff xrdp.ini.orig xrdp.ini
23c23,24
< port=3389
---
> ;;port=3389
> port=tcp://:3389

// restart xrdp
$ sudo systemctl restart xrdp
You can test the setup from any other linux computer with remmina installed, or you can secure-shell into the Linux server with X11 forwarding using the ‘-Y’ option and run ‘remmina’ from the command-line; that is:
// Suppose that your server is named pi.home
$ ssh -Y pi.home

// Test if X11 forwarding is working:
$ xhost
access control enabled, only authorized clients can connect
SI:localuser:myname


// If remmina is not installed, then install it:
$ sudo apt install remmina
$ remmina

// Start remmina and log into the server with your username and password.
// You can save a connection profile with a custom resolution setting
// to get the best possible presentation.
There are many web-based tutorials; check out XRDP on Ubuntu 22.04. This tutorial shows how to connect from Windows and from macOS as well.
X2Go is my favourite remote desktop setup since it runs seamlessly via secure shell connections and can use SSH key pairs to avoid password use. Thus I can comfortably connect as a remote desktop to remote servers across the continent, and write and test code as if I was down the hall from the remote server.
// install both the server and the client software
$ sudo apt install x2goserver x2goclient
...
Setting up x2goserver-x2goagent (4.1.0.3-5) ...
Setting up x2goserver (4.1.0.3-5) ...
Created symlink /etc/systemd/system/multi-user.target.wants/x2goserver.service
...

$ systemctl list-unit-files | grep -i x2go
x2goserver.service                         enabled         enabled
Your local desktop must have x2goclient installed so that you can start a remote X2Go desktop. From any Linux desktop running an X.org service you can start it from the command-line. This way the client inherits the SSH environment variables (you can also embed a small shell script which provides the environment in a custom application launcher).
// Bring up the application window; redirect stderr to /dev/null to ignore
//  various uninteresting messages.
$ x2goclient 2>/dev/null
Create and save the session parameters by starting a new session:
If you are using X2Go between different Linux varieties you might need to solve a few problems like font paths.
At the time of documenting this setup I found that starting the x2goclient from an older Linux system like CentOS 7 to this Ubuntu system needed a tweak in the Ubuntu Pi’s sshd configuration in /etc/ssh/sshd_config; it was fixed by adding ‘PubkeyAcceptedAlgorithms +ssh-rsa’. This was not needed between similar Ubuntu setups.
Usually your home directory on your Linux desktop is where most of your important files reside. When you shutdown your desktop then those files are inaccessible. If you also have a Linux laptop then it would be nice to have the same home directory available on both the desktop and the laptop.
Putting your home directory on the Linux server would solve this issue. Here we look at installing an NFS service for 24x7 availability. If you have no other Linux devices then skip this chapter.
First install the needed packages. The nfs-common package contains both client and server elements; the nfs-kernel-server contains the server daemons rpc.mountd and rpc.nfsd.
$ sudo apt install nfs-common nfs-kernel-server
...
The following NEW packages will be installed:
  keyutils libevent-core-2.1-7 nfs-common nfs-kernel-server rpcbind
...
Setting up rpcbind (1.2.6-2build1) ...
Created symlink /etc/systemd/system/multi-user.target.wants/rpcbind.service ...
Created symlink /etc/systemd/system/sockets.target.wants/rpcbind.socket ...
...
Creating config file /etc/idmapd.conf with new version
Creating config file /etc/nfs.conf with new version
...
Created symlink /etc/systemd/system/multi-user.target.wants/nfs-client.target ...
Created symlink /etc/systemd/system/remote-fs.target.wants/nfs-client.target ...
...
Setting up nfs-kernel-server (1:2.6.1-1ubuntu1.2) ...
Created symlink /etc/systemd/system/nfs-client.target.wants/nfs-blkmap.service ...
Created symlink /etc/systemd/system/multi-user.target.wants/nfs-server.service ...
...
Creating config file /etc/exports with new version
Creating config file /etc/default/nfs-kernel-server with new version
...

// show NFS and RPC services which are now enabled:
$ systemctl list-unit-files --state=enabled | egrep 'nfs|rpc'
nfs-blkmap.service                  enabled enabled
nfs-server.service                  enabled enabled
rpcbind.service                     enabled enabled
rpcbind.socket                      enabled enabled
nfs-client.target                   enabled enabled

// show NFS and RPC processes currently running:
$ ps -ef |egrep 'nfs|rpc'
_rpc      271754       1  0 10:45 ?        00:00:00 /sbin/rpcbind -f -w
root      272176       2  0 10:46 ?        00:00:00 [rpciod]
root      272280       1  0 10:46 ?        00:00:00 /usr/sbin/rpc.idmapd
statd     272282       1  0 10:46 ?        00:00:00 /sbin/rpc.statd
root      272285       1  0 10:46 ?        00:00:00 /usr/sbin/nfsdcld
root      272286       1  0 10:46 ?        00:00:00 /usr/sbin/rpc.mountd
root      272294       2  0 10:46 ?        00:00:00 [nfsd]
root      272295       2  0 10:46 ?        00:00:00 [nfsd]
root      272296       2  0 10:46 ?        00:00:00 [nfsd]
root      272297       2  0 10:46 ?        00:00:00 [nfsd]
root      272298       2  0 10:46 ?        00:00:00 [nfsd]
root      272299       2  0 10:46 ?        00:00:00 [nfsd]
root      272300       2  0 10:46 ?        00:00:00 [nfsd]
root      272301       2  0 10:46 ?        00:00:00 [nfsd]
There are a few files to configure. We remove IPv6 RPC services by commenting out udp6 and tcp6 from /etc/netconfig:
$ sudo cp -p /etc/netconfig /etc/netconfig.orig
$ sudo nano /etc/netconfig
$ diff /etc/netconfig.orig /etc/netconfig
15,16c15,16
< udp6       tpi_clts      v     inet6    udp     -       -
< tcp6       tpi_cots_ord  v     inet6    tcp     -       -
---
> #udp6       tpi_clts      v     inet6    udp     -       -
> #tcp6       tpi_cots_ord  v     inet6    tcp     -       -
Before restarting the daemons we see various IPv6 processes running:
$ sudo lsof -i | grep rpc | grep IPv6
systemd        1      root  144u  IPv6 899098    0t0  TCP :sunrpc (LISTEN)
systemd        1      root  145u  IPv6 899100    0t0  UDP :sunrpc
rpcbind   271754      _rpc    6u  IPv6 899098    0t0  TCP :sunrpc (LISTEN)
rpcbind   271754      _rpc    7u  IPv6 899100    0t0  UDP :sunrpc
rpc.statd 272282     statd   10u  IPv6 897604    0t0  UDP :59540
rpc.statd 272282     statd   11u  IPv6 897608    0t0  TCP :47971 (LISTEN)
rpc.mount 272286      root    6u  IPv6 900420    0t0  UDP :53821
rpc.mount 272286      root    7u  IPv6 902332    0t0  TCP :45067 (LISTEN)
rpc.mount 272286      root   10u  IPv6 902347    0t0  UDP :43059
rpc.mount 272286      root   11u  IPv6 902352    0t0  TCP :39207 (LISTEN)
rpc.mount 272286      root   14u  IPv6 902367    0t0  UDP :52374
rpc.mount 272286      root   15u  IPv6 902372    0t0  TCP :52705 (LISTEN)

// restart the daemons (only the rpcbind ports still report IPv6)
$ sudo systemctl restart rpcbind nfs-server rpc-statd
Finally, the NFS shares need to be published and shared. It is best to export /home so that logins on both the server and any clients use the same ‘/home’ directories. If you use other directory names you need to change the home directory path in the password file, or create a symbolic link from /home to the new directory – though we can do this, it is a bit messy.
// Edit the exports file on the NFS server:
$ sudo cp -p /etc/exports /etc/exports.orig
$ sudo nano /etc/exports

$ diff /etc/exports.orig /etc/exports
6c6,11
< #
---
>
> # Export home directories using NFSv3 syntax
> # Limit nfs access to the IP address of the client node(s)
> /home   192.168.1.65(rw,sync,no_subtree_check) \
>         192.168.1.85(rw,sync,no_subtree_check)
>
Then export the share. It can then be mounted on other clients.
$ sudo exportfs -aWe will use autofs on other Linux hosts to automatically mount and unmount the home directory on demand. Note that any current directories in /home on your client will be affected, since we are going to mount the server’s /home directory using the /home directory. Anything in that directory will be hidden until you unmount the server’s version of /home. Consider migrating the content of /home to the server.
This example uses another Ubuntu host as the NFS client. We install autofs on it and then edit the automount map files as needed.
// install the autofs package
$ sudo apt install autofs
The following additional packages will be installed:
  keyutils libevent-core-2.1-7 nfs-common rpcbind
...
Setting up rpcbind (1.2.6-2build1) ...
Created symlink /etc/systemd/system/multi-user.target.wants/rpcbind.service ...
Created symlink /etc/systemd/system/sockets.target.wants/rpcbind.socket ...
...
Setting up autofs (5.1.8-1ubuntu1.2) ...
Creating config file /etc/auto.master with new version
...
Setting up nfs-common (1:2.6.1-1ubuntu1.2) ...
...
Created symlink /etc/systemd/system/multi-user.target.wants/nfs-client.target ...
Created symlink /etc/systemd/system/remote-fs.target.wants/nfs-client.target ...

// If you are getting used to reading 'man' pages, then it is useful to use
// the 'man -k' option to get a list and description of all man pages available
// matching a topic:
$ man -k autofs
auto.master (5)      - Master Map for automounter consulted by autofs
autofs (5)           - Format of the automounter maps
autofs (8)           - Service control for the automounter
autofs.conf (5)      - autofs configuration
automount (8)        - manage autofs mount points

// Now edit configuration file /etc/autofs.conf and get rid of the 'amd' section
// Keep things simple.
$ cd /etc
$ sudo cp -p autofs.conf autofs.conf.orig
$ sudo nano autofs.conf
$ diff autofs.conf.orig autofs.conf
404c404
< [ amd ]
---
> #[ amd ]
410c410
< dismount_interval = 300
---
> #dismount_interval = 300

// Edit configuration file /etc/auto.master
// We comment out the '+auto.master' line and append the auto.home configuration

$ sudo cp -p auto.master auto.master.orig
$ sudo nano auto.master
$ diff auto.master.orig auto.master
22c22
< +dir:/etc/auto.master.d
---
> #+dir:/etc/auto.master.d
38c38,43
< +auto.master
---
> #+auto.master
>
> ## This is a direct mountpoint for NFS-provided home directories ..
> /-      /etc/auto.home --timeout 300
>

// We create /etc/auto.home; every regular user you create also needs
//  an entry in this file.
$ sudo nano /etc/auto.home
$ cat /etc/auto.home
## For every new user you must add their home directory entry to this file.
## The IP address belongs to the Linux Server of course...
/home/myname \
  -rw,hard,intr,rsize=32768,wsize=32768,retrans=2,timeo=600,tcp,nfsvers=3 \
  192.168.1.90:/home/myname
Now, you would normally restart autofs - but do not do this immediately:
// restart autofs:
$ sudo systemctl restart autofs
Consider your impending ‘chicken-and-egg’ issue regarding being a regular user logged into your home directory while you restart autofs, causing your current home directory to disappear. There is some help on this topic in the appendix. Perhaps the easiest solution if you do not want to fiddle with changes to root access is to reboot your client device. If there were no mistakes in your configuration changes then when the client is back up again you should have a home directory that is served by your home server.
$ pwd
/home/myname
$ df -h .
Filesystem                    Size  Used Avail Use% Mounted on
192.168.1.90:/home/myname 50G 464M 50G 1% /home/mynameOnce you NFS-mount your home directory on your clients, then if for any reason your server is down you will not be able to log in as a regular user. This would be a rare condition, but it would affect your ability to work from your other devices. You need to be able to login locally so that you can address the problem.
You could give your local root user a good password, or you could create another local user on each device and give them administrative rights so that they can use sudo for root access locally:
// Suppose the other user is called 'helper'
// We will give the helper user another home directory
$ sudo mkdir /var/home
$ sudo groupadd -g 1100 helper
$ sudo useradd -u 1100 -g helper -m -d /var/home/helper -c 'Helper Account' helper
$ sudo usermod -aG sudo helper
$ grep sudo /etc/group
sudo:x:27:myname,helper

// Don't forget to set a password - presumably it would be the same as your password..
$ sudo passwd helper
[sudo] password for myname:
New password:
Retype new password:
passwd: password updated successfullyThe main benefit of letting the automounter unmount your directory when you log out is that you can easily do maintenance on the server without disturbing the state of your clients - that is, your desktop or laptop or other devices which might still be turned on.
When you log out of a client then the automounter should unmount your directory at the configured time limit - in our case - 5 minutes. But there are some misbehaved software which insists on staying around, and you might want to watch out for that software and investigate what you can do with it. Indeed, your ssh-agent (if you are using it) is not going to go away unless you kill it before logging out. This process alone will keep your home directory mounted on the client.
One solution is to let the display manager clean up for you. If you are using the lightdm display manager then you need to make a root-owned script on your Linux client that will do the job:
// Remember, this is done on your Linux client desktop, not on the server:
$ cd /etc/lightdm
$ sudo /bin/bash
# touch lightdm.conf
# nano lightdm.conf
# cat lightdm.conf

[Seat:*]
session-cleanup-script=/root/bin/clean-up-user.sh

# cd /root
// make a bin directory if you don't have one
# mkdir bin
# touch clean-up-user.sh
# chmod 755 clean-up-user.sh
# nano clean-up-user.sh
# cat clean-up-user.sh
#!/bin/sh

## This script is called by the lightdm window manager.  It finds processes
## owned by users on logout, and kills them.  Don't use this script if your
## users need to leave any of these processes running on logout.

procs=$(ps -ef | grep -v grep | grep '/lib/systemd/systemd --user' | grep -v '^root')

echo "$procs" | while read user process rest ; do
  #echo debug: user is $user, proc is $process
  if [ "$user" != "" ] ; then
    #echo debug: kill $process
    kill $process
  fi
done

procs=$(ps -ef | grep -v grep | grep ssh-agent | grep -v '^root')
echo "$procs" | while read user process rest ; do
  #echo debug: user is $user, proc is $process
  if [ "$user" != "" ] ; then
    #echo debug: kill $process
    kill $process
  fi
done
If you are using an X2go remote desktop session then you will not go through the display manager. Therefore the above script will not be called. You can always create a copy of this script in your own ~/bin/ directory and run it from a terminal session just before logging out.
Setting up an Apache web server is a great way to learn about web technologies. Nginx is another web server available on Ubuntu, but we will concentrate instead on the Apache offering.
We start with installing and doing an initial configuration of an http-based service listening on port 80. Then we enable an https-based service listening on port 443. Enabling https requires setting up a certificate. Since the web server is only in your home network it is tricky to get an official web certificate. Instead we will create a self-signed certificate, and coax web clients to trust it. Another option is to build your own certificate authority.
Finally we will look at configuring ownership of some of the Apache directory infrastructure for future web projects and configuring a few virtual hosts.
Install the Apache software. The ssl-cert package allows us to later create an SSL certificate for the https service, so we will install it as well.
// The list of enabled apache modules on an Ubuntu system is also shown
// for your information:
$ sudo apt install apache2 ssl-cert
...
The following NEW packages will be installed:
  apache2 apache2-bin apache2-data apache2-utils libapr1 libaprutil1
  libaprutil1-dbd-sqlite3 libaprutil1-ldap liblua5.3-0
...
Setting up apache2 (2.4.52-1ubuntu4.5) ...
Enabling module mpm_event.
Enabling module authz_core.
Enabling module authz_host.
Enabling module authn_core.
Enabling module auth_basic.
Enabling module access_compat.
Enabling module authn_file.
Enabling module authz_user.
Enabling module alias.
Enabling module dir.
Enabling module autoindex.
Enabling module env.
Enabling module mime.
Enabling module negotiation.
Enabling module setenvif.
Enabling module filter.
Enabling module deflate.
Enabling module status.
Enabling module reqtimeout.
Enabling conf charset.
Enabling conf localized-error-pages.
Enabling conf other-vhosts-access-log.
Enabling conf security.
Enabling conf serve-cgi-bin.
Enabling site 000-default.
Created symlink /etc/systemd/system/multi-user.target.wants/apache2.service → ...
Created symlink /etc/systemd/system/multi-user.target.wants/apache-htcacheclean.service → ...
...
As always, systemd starts the daemon. It is only listening on port 80 at this point:
$ sudo lsof -i :80
COMMAND    PID     USER   FD   TYPE  DEVICE SIZE/OFF NODE NAME
apache2 508647     root    4u  IPv6 1799685      0t0  TCP *:http (LISTEN)
apache2 508650 www-data    4u  IPv6 1799685      0t0  TCP *:http (LISTEN)
...
$ sudo lsof -i :443
We can open a web client (firefox for example) and look at the default web page. We can also install a couple of useful text-based web clients which are useful for doing quick checks:
$ firefox http://pi.home/

$ sudo apt install links lynx
...
The following NEW packages will be installed:
  liblz1 links lynx lynx-common
...

$ links -dump http://pi.home/ | head
   Ubuntu Logo
   Apache2 Default Page
   It works!

   This is the default welcome page used to test the correct operation of the
   Apache2 server after installation on Ubuntu systems. ...

$ lynx --dump http://pi.home/ | head
   Ubuntu Logo
   Apache2 Default Page
   It works!
   ...
Log files for the Apache daemon are stored under /var/log/apache2/:
$ head /var/log/apache2/access.log
192.168.1.82 - -  ... "GET / HTTP/1.1" 200 3460 "-" "Mozilla/5.0 ... Firefox/113.0"
192.168.1.82 - -  ... "GET /icons/ubuntu-logo.png HTTP/1.1" 200 3607 "... Firefox/113.0"
192.168.1.82 - -  ... "GET /favicon.ico HTTP/1.1" 404 485 "http://pi.home/" ... Firefox/113.0"
192.168.1.100 - - ... "GET / HTTP/1.1" 200 3460 "-" "Links ... text)"
192.168.1.100 - - ... "GET / HTTP/1.0" 200 3423 "-" "Lynx/2.9.0dev.10 ... GNUTLS/3.7.1"Before we enable listening on port 443 we will generate a self-signed SSL certificate. I have a script named addcert.sh which will generate the needed certificate files. You need to use a configuration file named addcert.cnf and edit it to use your certificate details:
$ mkdir ~/certs
$ cd ~/certs
$ cp /path/to/addcert.cnf .
$ cp /path/to/addcert.sh ~/bin/
$ chmod 755 ~/bin/addcert.sh
$ nano addcert.cnf
$ ~/bin/addcert.sh
Certificate request self-signature ok
subject=C = CA, ST = British Columbia, ... CN = pi.home, emailAddress = some.email@somewhere.com
-r--r--r-- 1 myname myname 2000 Jun 21 10:00 server.crt
-r--r--r-- 1 myname myname 1740 Jun 21 10:00 server.csr
-r-------- 1 myname myname 3272 Jun 21 10:00 server.key
addcert.sh:  SVP copy server files into place and change ownership to root

// You can query the text version of your certificate:
$ openssl x509 -in server.crt -text | less
Certificate:
    Data:
        Version: 1 (0x0)
        Serial Number:
            70:5b:1d:...
        Signature Algorithm: sha256WithRSAEncryption
        Issuer: C = CA, ST = British Columbia, L = Cranbrook, O = Home ...
        ...
            Not Before: Jun 21 16:00:37 2023 GMT
            Not After : Jun 18 16:00:37 2033 GMT
        ...
The server key file and the server key certificate need to be copied into the Apache configuration area, and the ssl configuration paths need to be updated:
$ cd /etc/apache2
$ sudo mkdir certs
$ cd /home/myname/certs/
$ sudo cp -pi server.key server.crt /etc/apache2/certs/
$ cd /etc/apache2/certs
$ sudo chown root:root server.key server.crt
$ ls -l
-r--r--r-- 1 root root 2000 Jun 21 10:00 server.crt
-r-------- 1 root root 3272 Jun 21 10:00 server.key
Now we enable SSL in apache, using a utility named a2enmod. We also enable the SSL default configuration using the utility a2ensite. We need to edit the configuration file with our path to the certificate and key files. Once we have done that we can restart apache.
// enable the module:
$ sudo a2enmod ssl
Considering dependency setenvif for ssl:
Module setenvif already enabled
Considering dependency mime for ssl:
Module mime already enabled
Considering dependency socache_shmcb for ssl:
Enabling module socache_shmcb.
Enabling module ssl.
See /usr/share/doc/apache2/README.Debian.gz on how to ... and create self-signed certificates.
...

// enable the SSL configuration as a virtual host:
$ sudo a2ensite default-ssl
Enabling site default-ssl.
...

// Listing the enabled configuration files shows the following:
$ pwd
/etc/apache2/
$ ls -l sites-enabled/
lrwxrwxrwx ... Jun 19 10:47 000-default.conf -> ../sites-available/000-default.conf
lrwxrwxrwx ... Jun 21 10:19 default-ssl.conf -> ../sites-available/default-ssl.conf

// So we can edit '/etc/apache2/sites-available/default-ssl.conf'
$ cd /etc/apache2/sites-available
$ sudo cp -p default-ssl.conf default-ssl.conf.orig
$ sudo nano default-ssl.conf
$ diff default-ssl.conf.orig default-ssl.conf
32,33c32,33
<               SSLCertificateFile      /etc/ssl/certs/ssl-cert-snakeoil.pem
<               SSLCertificateKeyFile /etc/ssl/private/ssl-cert-snakeoil.key
---
>               SSLCertificateFile      /etc/apache2/certs/server.crt
>               SSLCertificateKeyFile   /etc/apache2/certs/server.key

$ sudo systemctl restart apache2
$ sudo lsof -i | grep apache
apache2  549190         root   4u  IPv6 1943852      0t0  TCP *:http (LISTEN)
apache2  549190         root   6u  IPv6 1943856      0t0  TCP *:https (LISTEN)
apache2  549191     www-data   4u  IPv6 1943852      0t0  TCP *:http (LISTEN)
apache2  549191     www-data   6u  IPv6 1943856      0t0  TCP *:https (LISTEN)
apache2  549192     www-data   4u  IPv6 1943852      0t0  TCP *:http (LISTEN)
apache2  549192     www-data   6u  IPv6 1943856      0t0  TCP *:https (LISTEN)
Now we want to test the secured web connection connection, and ask your web browser to accept the certificate. With firefox we select ‘Advanced’ where we see the message
Error code: MOZILLA_PKIX_ERROR_SELF_SIGNED_CERT
We go ahead and accept the risk and we see our default secured web page. You only need to do this once.
Both text mode browsers will warn about self-signed certificates, but also will allow you to connect:
$ firefox https://pi.home

// This example is with 'links' -- we ignore self-signed certs when we use
// the '-ssl.certicates 0' option
$ links -dump -ssl.certificates 0  http://pi.home/ | head
   Ubuntu Logo
   Apache2 Default Page
   It works!

This is the default welcome page used to test ...When developing web infrastructure and editing web pages you should always work as a regular user, and never as root. The best way to proceed is to assign ownership of specific directories in the web tree to regular users like yourself.
One way to do this is to simply change the ownership of /var/www/html/ to yourself – this will also change ownership for any files in the directory. This way you can immediately add and change content as a regular user.
$ cd /var/www/html
$ sudo chown -R myname:myname .
Another way to do this is to make sub-directories inside /var/www/html/ and assign ownership of them to yourself. Then you add your own site configuration file(s) in /etc/apache2/sites-available/ with your new sub-directory path(s) and enable them.
// Make a couple of subdirectories and assign them to yourself.  Suppose
// you want to use http-served pages for development under /var/www/html/test/,
// and use https-served pages for production under /var/www/html/pi/.
// We also copy the existing 'index.html' file to each sub-directory as a
// quick test:
$ cd /var/www/html
$ sudo mkdir test pi
$ sudo cp -p /var/www/html/index.html test/
$ sudo cp -p /var/www/html/index.html pi/
$ sudo chown -R myname:myname test pi

// Let's change the 'title' description in both 'index.html' files so that
// we see the difference in testing:
$ nano pi/index.html
$ nano test/index.html
$ grep 'title' pi/index.html test/index.html
pi/index.html:    <title>Apache2 Ubuntu Default Page on HTTPS (secure): It works</title>
test/index.html:    <title>Apache2 Ubuntu Default Page on HTTP (no encryption): It works</title>

// Create a configuration file based on the existing configurations:
$ cd /etc/apache2/sites-available
$ sudo cp -p 000-default.conf test.conf

// Change the DocumentRoot, and also change the log files names for this site:
$ sudo nano test.conf
$ diff 000-default.conf test.conf
12c12
<       DocumentRoot /var/www/html
---
>       DocumentRoot /var/www/html/test
20,21c20,21
<       ErrorLog ${APACHE_LOG_DIR}/error.log
<       CustomLog ${APACHE_LOG_DIR}/access.log combined
---
>       ErrorLog ${APACHE_LOG_DIR}/test-error.log
>       CustomLog ${APACHE_LOG_DIR}/test-access.log combined

$ sudo cp -p default-ssl.conf pi.conf

// Again, change the DocumentRoot, and change the log files names for this site:
$ sudo nano pi.conf
$ diff default-ssl.conf pi.conf
5c5
<               DocumentRoot /var/www/html
---
>               DocumentRoot /var/www/html/pi
13,14c13,14
<               ErrorLog ${APACHE_LOG_DIR}/error.log
<               CustomLog ${APACHE_LOG_DIR}/access.log combined
---
>               ErrorLog ${APACHE_LOG_DIR}/pi-error.log
>               CustomLog ${APACHE_LOG_DIR}/pi-access.log combined

// Finally enable the new site configurations, and disable the old ones;
// then restart apache:
$ sudo a2ensite test
Enabling site test.
...
$ sudo a2ensite pi
Enabling site pi.
...
$ sudo a2dissite 000-default default-ssl
Site 000-default disabled.
Site default-ssl disabled.
...
$ ls -l /etc/apache2/sites-enabled/
total 0
lrwxrwxrwx 1 root root 26 Jun 22 14:11 pi.conf -> ../sites-available/pi.conf
lrwxrwxrwx 1 root root 28 Jun 22 14:11 test.conf -> ../sites-available/test.conf
$ sudo systemctl restart apache2
$ systemctl status apache2
     ...
     Active: active (running) since Thu 2023-06-22 14:14:00 MDT; 2s ago
     ...
Now test the changed configurations using links and the ‘-source’ argument:
$ links -source http://pi.home/ | grep title
    <title>Apache2 Ubuntu Default Page on HTTP (no encryption): It works</title>

$ links -source -ssl.certificates 0 https://pi.home/ | grep title
    <title>Apache2 Ubuntu Default Page on HTTPS (secure): It works</title>
Also, you can always add new sub-directories for web page design, rather than changing ownership inside /var/www/html. For example, create a sub-directory owned by yourself named /var/www/sites and add your own site configuration in /etc/apache2/sites-available/ with your new sub-directory path(s) and enable them. The exercise is very similar to the previous example.
For home use the default settings in /etc/apache2/apache2.conf are fine. However these settings are too open in my opinion, and I would never keep such a configuration on a publicly-exposed web server.
Be aware of these settings if you plan on using home-grown configurations on an internet-exposed site:
When you work on internet-exposed sites you should generally learn enough about Apache configurations to cope with installing new packages and safely configuring them, without depending on deliberately loose initial configurations that shield you from necessary details.
If you want to configure Apache to listen only for IPv4 connections, then alter /etc/apache2/ports.conf and change instances of Listen PORTNUMBER to Listen 0.0.0.0:PORTNUMBER. You will also need to change site configuration VirtualHost settings to use 0.0.0.0:PORTNUMBER. By using ‘0.0.0.0’ all hardware network interfaces on your machine would serve web pages. On SBC hardware that is not an issue; on complex hardware with multiple network interfaces on differing networks this would not necessarily be what you wanted - in that case a specific IP address is used instead.
$ cd /etc/apache2
$ diff ports.conf.orig ports.conf
5c5
< Listen 80
---
> Listen 0.0.0.0:80
8c8
<       Listen 443
---
>       Listen 0.0.0.0:443
12c12
<       Listen 443
---
>       Listen 0.0.0.0:443

$ diff sites-available/000-default.conf.orig sites-available/000-default.conf
1c1
< <VirtualHost *:80>
---
> <VirtualHost 0.0.0.0:80>
10a11,12
>       ServerName pi.home
>       ServerAlias pi
12c14,20
<       DocumentRoot /var/www/html
---
>       DocumentRoot /var/www/html/test
...

$ diff sites-available/default-ssl.conf.orig sites-available/default-ssl.conf
2c2
<       <VirtualHost _default_:443>
---
>       <VirtualHost 0.0.0.0:443>
...If you are interesting in doing some embedded PHP web development then you only need to install the PHP Apache module:
$ sudo apt install libapache2-mod-php
 ...
The following additional packages will be installed:
  libapache2-mod-php8.1 php-common php8.1-cli php8.1-common php8.1-opcache
  php8.1-readline
 ...
Unpacking libapache2-mod-php (2:8.1+92ubuntu1) ...
Setting up php-common (2:92ubuntu1) ...
Created symlink /etc/systemd/system/timers.target.wants/phpsessionclean.timer ...
 ...
Setting up libapache2-mod-php8.1 (8.1.2-1ubuntu2.11) ...
apache2_invoke: Enable module php8.1
Setting up libapache2-mod-php (2:8.1+92ubuntu1) ...
 ...

// the PHP module is already enabled:
$ cd /etc/apache2/
$ find . -iname \*php\*
./mods-available/php8.1.conf
./mods-available/php8.1.load
./mods-enabled/php8.1.conf
./mods-enabled/php8.1.load
You can quickly test that PHP works; simply create a PHP file in the root of your new web tree and point your browser to it:
// Here we assume that the root of your web tree is at /var/www/html/test/
$ cd /var/www/html/test/
$ echo "<?php phpinfo() ?>" > info.php

// now use either 'firefox' or 'links' to look at it:
$ firefox http://pi.home/info.php

$ links -dump http://pi.home/info.php | head
   PHP logo

   PHP Version 8.1.2-1ubuntu2.11

   System            Linux pi.home 5.15.0-1029-raspi #31-Ubuntu SMP PREEMPT
                     Sat Apr 22 12:26:40 UTC 2023 aarch64
   Build Date        Feb 22 2023 22:56:18
   Build System      Linux
   Server API        Apache 2.0 Handler
 ...

// The PHP function 'phpinfo()' shows all configuration information that
// you as a developer want to know about.  However, do not expose all this
// information to others in a publicly available web site.  Remove the
// info.php file after use, or hide it from the apache daemon:
$ cd /var/www/html/test/
$ rm info.php
// or set it read-write to yourself only:
$ chmod 600 info.php
You might want to disable PHP session cleanup until a later time when you are actually making use of PHP sessions. You can re-enable this later when you think you need it:
$ systemctl list-unit-files | grep php
phpsessionclean.service                    static          -
phpsessionclean.timer                      enabled         enabled

$ sudo systemctl mask phpsessionclean.timer
Created symlink /etc/systemd/system/phpsessionclean.timer → /dev/null.

$ tail -1 /etc/cron.d/php
09,39 *     * * *     root   [ -x /usr/lib/php/sessionclean ] && if ...

// This is an example case of not making a copy of a file in the same directory.
// All valid files in '/etc/cron.d/' are subject to being run by the 'cron'
// daemon.  Instead we put a copy in root's home directory, in case we need it
// as a reference:
$ sudo cp -p /etc/cron.d/php /root/php.orig

// When we edit this cron file we comment out the active entry with a '#':
$ sudo nano /etc/cron.d/php
$ sudo diff /root/php.orig /etc/cron.d/php
14c14
< 09,39 *     * * *     root   [ -x /usr/lib/php/sessionclean ] && if ...
---
> #09,39 * * * * root [ -x /usr/lib/php/sessionclean ] && if ...Linux is a great platform for databases. There are lots of options if you want to dabble in database technology – take a look at an example list of well-known open source database offerings on zenarmor.com. Ubuntu packages and supports PostgreSQL, SQLite, MariaDB and Redis mentioned on that list.
Here we are going to set up a MariaDB server. MariaDB is a fork of MySQL, well known as one of the four pillars of a LAMP (Linux, Apache, MySQL, PHP/Perl/Python) Server. Note that Ubuntu also provides the MySQL offering that follows the Oracle MySQL maintainers – that package is named mysql-server.
The main package for a MariaDB server is mariadb-server. It pulls in additional support packages, including the client software used to query the server databases. Once up and running it listens on port 3306, which is defined in mariadb.cnf. That file is found with other MySQL configuration files residing in /etc/mysql/ on a Debian-based system. Note that there is also a file named my.cnf in the configuration area. When you install MariaDB the file ‘my.cnf’ is a symbolic link, pointing through /etc/alternatives to ‘mariadb.cnf’.
Some of the log files go to /var/log/mysql/ if you configure it in the server configuration file. Otherwise status logging shows up in /var/log/syslog.
$ sudo apt install mariadb-server
...
The following additional packages will be installed:
  galera-4 libcgi-fast-perl libcgi-pm-perl libconfig-inifiles-perl libdaxctl1
  libdbd-mysql-perl libfcgi-bin libfcgi-perl libfcgi0ldbl
  libhtml-template-perl libmariadb3 libmysqlclient21 libndctl6 libpmem1
  mariadb-client-10.6 mariadb-client-core-10.6 mariadb-common
  mariadb-server-10.6 mariadb-server-core-10.6 mysql-common socat
...
Setting up mariadb-server-10.6 (1:10.6.12-0ubuntu0.22.04.1) ...
Created symlink /etc/systemd/system/multi-user.target.wants/mariadb.service ...
....

// The server by default listens on port 3306; here we see that only localhost
// is bound to that port in the lsof output.  Thus LAN nodes cannot connect:
$ sudo lsof -i :3306
COMMAND     PID  USER   FD   TYPE  DEVICE SIZE/OFF NODE NAME
mariadbd 709549 mysql   18u  IPv4 2506936      0t0  TCP localhost:mysql (LISTEN)

// The database files reside in '/var/lib/mysql/'
// That directory is protected, so you must use sudo to see it:
$ sudo ls -CpF /var/lib/mysql/
aria_log.00000001  ib_buffer_pool  multi-master.info    sys/
aria_log_control   ibdata1         mysql/
ddl_recovery.log   ib_logfile0     mysql_upgrade_info
debian-10.6.flag ibtmp1 performance_schema/The very first thing to do is secure the default configuration. There is a utility named mysql_secure_installation which helps you do this. Note that the MySQL internal administrative user is also named root - this is not the root user for the Linux operating system.
This utility allows you to do these things:
The default answer is ‘Y’ to these questions; therefore if you hit the carriage return you will get the defaults below:
$ mysql_secure_installation
...
Switch to unix_socket authentication [Y/n]
Change the root password? [Y/n]
Remove anonymous users? [Y/n]
Disallow root login remotely? [Y/n]
Remove test database and access to it? [Y/n]
...
Since we set a mysql superuser (‘root’) password, then any user logged into our server can connect as the mysql superuser if they know that password. Otherwise, users with sudo privileges can connect without needing the password:
$ mysql -u root
ERROR 1698 (28000): Access denied for user 'root'@'localhost'

// Use the '-p' option to get the password prompt:
$ mysql -u root -p
Enter password:
Welcome to the MariaDB monitor.  Commands end with ; or \g.
...

// Or use sudo to connect without the mysql superuser password:
// While we are at it, lets look at MySQL system variables to see what
// the storage engine defaults might be:
$ sudo mysql -u root
[sudo] password for myname:
Welcome to the MariaDB monitor.  Commands end with ; or \g.
Your MariaDB connection id is 33
Server version: 10.6.12-MariaDB-0ubuntu0.22.04.1 Ubuntu 22.04
...
MariaDB> show variables like '%engine%';
+----------------------------+--------+
| Variable_name              | Value  |
+----------------------------+--------+
| default_storage_engine     | InnoDB |
| default_tmp_storage_engine |        |
| enforce_storage_engine     |        |
| gtid_pos_auto_engines      |        |
| storage_engine             | InnoDB |
+----------------------------+--------+
5 rows in set (0.004 sec)
MariaDB> show engines;
+--------------------+---------+---------------------------------------+--------------+-------+
| Engine             | Support | Comment                               | Transactions | XA ...|
+--------------------+---------+---------------------------------------+--------------+-------+
| CSV                | YES     | Stores tables as CSV files            | NO           | NO ...|
| MRG_MyISAM         | YES     | Collection of identical MyISAM tab... | NO           | NO ...|
| MEMORY             | YES     | Hash based, stored in memory, usef... | NO           | NO ...|
| Aria               | YES     | Crash-safe tables with MyISAM heri... | NO           | NO ...|
| MyISAM             | YES     | Non-transactional engine with good... | NO           | NO ...|
| SEQUENCE           | YES     | Generated tables filled with seque... | YES          | NO ...|
| InnoDB             | DEFAULT | Supports transactions, row-level l... | YES          | YES...|
| PERFORMANCE_SCHEMA | YES     | Performance Schema                    | NO           | NO ...|
+--------------------+---------+---------------------------------------+--------------+-------+

MariaDB> exit;
ByeMost users who use MySQL databases interact with their own databases, and do not need to touch the administrative server mysql databases. So it is reasonable to expect users to connect to the database from another host. Here we configure the Mariadb server to listen for LAN connections, thus allowing users to connect via our home LAN:
$ head /etc/mysql/mariadb.cnf
 # The MariaDB configuration file
 #
 # The MariaDB/MySQL tools read configuration files in the following order:
 # 0. "/etc/mysql/my.cnf" symlinks to this file, reason why all the rest is read.
 # 1. "/etc/mysql/mariadb.cnf" (this file) to set global defaults,
 # 2. "/etc/mysql/conf.d/*.cnf" to set global options.
 # 3. "/etc/mysql/mariadb.conf.d/*.cnf" to set MariaDB-only options.
 # 4. "~/.my.cnf" to set user-specific options.
...
$ cd /etc/mysql/mariadb.conf.d
$ sudo cp -p 50-server.cnf 50-server.cnf.orig
// Edit the server configuration, and change the 'bind-address' to 0.0.0.0
// Also enable separate error and slow-query logging:
$ sudo nano 50-server.cnf
$ diff 50-server.cnf.orig 50-server.cnf
27c27,28
< bind-address            = 127.0.0.1
---
> #bind-address            = 127.0.0.1
> bind-address            = 0.0.0.0
57c58
< #log_error = /var/log/mysql/error.log
---
> log_error = /var/log/mysql/error.log
59c60
< #slow_query_log_file    = /var/log/mysql/mariadb-slow.log
---
> slow_query_log_file    = /var/log/mysql/mariadb-slow.log

$ sudo systemctl restart mariadb
$ sudo lsof -i :3306
COMMAND     PID  USER   FD   TYPE  DEVICE SIZE/OFF NODE NAME
mariadbd 716168 mysql   18u  IPv4 2530211      0t0  TCP *:mysql (LISTEN)


// Though we can connect we are not allowed access until we create a regular
// database user:
$ mysql -u root -h pi.home -p
Enter password:
ERROR 1130 (HY000): Host 'desktop.home' is not allowed to connect to this MariaDB server
So back on the database server let’s create an empty database and two users with LAN access to it. One user is ‘rw’ (read-write) with all privileges on its own database; the other user is ‘ro’ (read-only) with only select privileges on its database. In this example the LAN network is identified by all hosts in 192.168.1.
The default MariaDB storage engine is InnoDB; for this exercise we will create a database named webdb. Until you create at least one table there is only a directory with a text options file exists in the database area. Thus the database engine is defined when tables are created, not at database creation.
There is extensive help at the database prompt:
$ sudo mysql -u root
...
MariaDB> help create database;
Name: 'CREATE DATABASE'
Description:
Syntax
------

CREATE [OR REPLACE] {DATABASE | SCHEMA} [IF NOT EXISTS] db_name
  [create_specification] ...
...
URL: https://mariadb.com/kb/en/create-database/

MariaDB> create database webdb;
...
MariaDB>  grant all privileges on webdb.* to 'rw'@'192.168.1.%'
    -> identified by 'some_password_here';

MariaDB> grant select on webdb.* to 'ro'@'192.168.1.%'
    -> identified by 'some_other_password_here';

MariaDB> flush privileges;
Query OK, 0 rows affected (0.002 sec)

MariaDB> select concat(user, '@', host) from mysql.global_priv;
+-------------------------+
| concat(user, '@', host) |
+-------------------------+
| ro@192.168.1.%          |
| rw@192.168.1.%          |
| mariadb.sys@localhost   |
| mysql@localhost         |
| root@localhost          |
+-------------------------+
5 rows in set (0.001 sec)

// Now I can connect to the database from my desktop:

$ mysql -u rw -h pi.home -p webdb
Enter password:
Welcome to the MariaDB monitor.  Commands end with ; or \g.
Now we add a simple table named mytab using the older MyISAM engine. It is annoying to try to create a table interactively. It is better to create a small text file first. So I create an sql file ‘create_tab.sql’, and I source it at the database prompt:
MariaDB> source create_tab.sql;
Query OK, 0 rows affected (0.02 sec)

MariaDB> show tables;
+-----------------+
| Tables_in_webdb |
+-----------------+
| members         |
+-----------------+
1 row in set (0.00 sec)

MariaDB> show create table members;
...
| members | CREATE TABLE `members` (
  `uid` int(8) unsigned NOT NULL AUTO_INCREMENT,
  `moddate` timestamp NOT NULL DEFAULT current_timestamp() ON UPDATE current_timestamp(),
  `credate` timestamp NOT NULL DEFAULT current_timestamp(),
  `role` set('user','admin') NOT NULL DEFAULT 'user',
  `email` set('Y','N') NOT NULL DEFAULT 'N',
  PRIMARY KEY (`uid`)
) ENGINE=MyISAM DEFAULT CHARSET=utf8mb4 COLLATE=utf8mb4_general_ci |
...

// And I insert a row into the table:
MariaDB> insert into members (email) values ('Y');
Query OK, 1 row affected (0.00 sec)

MariaDB> select * from members;
+-----+---------------------+---------------------+------+-------+
| uid | moddate             | credate             | role | email |
+-----+---------------------+---------------------+------+-------+
|   1 | 2023-06-30 16:09:29 | 2023-06-30 16:09:29 | user | Y     |
+-----+---------------------+---------------------+------+-------+
1 row in set (0.01 sec)

// Then I reconnect as the 'read-only' user.  I can select but nothing else:
$ mysql -u ro -h pi.home -p webdb
Enter password:
Reading table information for completion of table and column names
...
MariaDB> select * from members;
+-----+---------------------+---------------------+------+-------+
| uid | moddate             | credate             | role | email |
+-----+---------------------+---------------------+------+-------+
|   1 | 2023-06-30 16:09:29 | 2023-06-30 16:09:29 | user | Y     |
+-----+---------------------+---------------------+------+-------+
1 row in set (0.00 sec)

MariaDB> delete from members;
ERROR 1142 (42000): DELETE command denied to user 'ro'@'desktop.home' for table `webdb`.`members`

$ sudo ls -l /var/lib/mysql/webdb/
-rw-rw---- 1 mysql mysql   67 Jun 30 15:10 db.opt
-rw-rw---- 1 mysql mysql 1050 Jun 30 16:09 members.frm
-rw-rw---- 1 mysql mysql   15 Jun 30 16:09 members.MYD
-rw-rw---- 1 mysql mysql 2048 Jun 30 16:09 members.MYIDatabases typically cannot be backed up reliably by backing up the filesystem on which they live. Minimally you would need to shut down the database to get a copy of it using this method.
Instead, databases have some sort of export facility that locks and dumps databases on demand, while also leaving the database up and running. Databases also need an import facility to re-create databases from the dump files.
For MariaDB and MySQL mysqldump is used to export data, while mysqlimport is used to re-create databases.
An example mysql backup script in my github ‘tools’ area can do local backups of the MariaDB database; it should be installed as /root/bin/mysql-backup.sh. It needs a configuration file as well which must be installed as /etc/mysql-backup.conf:
// Edit the configuration file in case you want to use different directories:
$ sudo nano /etc/mysql-backup.conf

// Run the script in debug mode from the command line to make sure
// that everything is correctly configured:
$ sudo /root/bin/mysql-backup.sh --test

// Run the script once and check the log file for any errors:
$ sudo /root/bin/mysql-backup.sh

// Finally edit the cronjob to do daily database backups (here at 03h00):
$ EDITOR=/bin/nano sudo crontab -e
$ sudo crontab -l | grep mysql
0 3 * * * /root/bin/mysql-backup.shServices like github.com are wonderful, but sometimes it is useful and necessary to create your own Git server. You might have extremely sensitive data that cannot be exposed on public servers. Sometimes at work you might have internal networks which are deliberately shielded from the public internet, and you might want to play with git at home to learn about running your own server.
Here we look at installing and configuring a Git service. We will also install gitweb so that we have a web interface for browsing the git repositories. It will not be as funky as github, but it will still be useful.
The git service documented here supports 2 protocols accessing our git repositories. Of course, these services are for our home LAN:
If ‘git’ is not yet installed, then do it. The Debian git package also includes a git server binary, and a git ‘shell’:
$ sudo apt install git
...
Selecting previously unselected package liberror-perl.
Selecting previously unselected package git-man.
Selecting previously unselected package git.
...

// You can get a listing of all components of the git package and search
// for specific files:
$ dpkg -L git | grep daemon
/usr/lib/git-core/git-daemon
/usr/lib/git-core/git-credential-cache--daemon

$ dpkg -L git | grep shell
/usr/bin/git-shell
/usr/lib/git-core/git-shell
/usr/share/doc/git/contrib/git-shell-commands
/usr/share/doc/git/contrib/git-shell-commands/README
...
There are a couple of envelope packages for git-daemon offered by Ubuntu:
The documentation for git-daemon-run claims:
$ apt show git-daemon-run
...
 git-daemon, as provided by the git package, is a simple server for git
 repositories, ideally suited for read-only updates, i.e. pulling from git
 repositories through the network.  This package provides a runit service
 for running git-daemon permanently.  This configuration is simpler and
 more reliable than git-daemon-sysvinit, at a cost of being less
 familiar for administrators accustomed to sysvinit.
We will not use either package for a read-only git pull service; instead we will install xinetd and then the daemon will listen for requests and respond. Note that if you do not want a read-only git pull service then you can skip the section on Setting up the Git Protocol.
First we need a user, as well as a defined group for that user:
// I picked an unused uid and gid less than 1000 (regular users start at uid 1000):
$ sudo groupadd -g 600 git
$ sudo useradd -u 600 -g git -m -s '/usr/bin/git-shell' -c 'Code Versioning' git
$ ls -la /home/
ls -la /home/
drwxr-xr-x  4 root     root       33 Jul  7 16:11 .
drwxr-xr-x 21 root     root     4096 Jul  6 14:40 ..
drwxr-x--- 27 myname   myname   4096 Jul  7 16:08 myname
drwxr-x---  5 git      git        58 Jul  6 14:43 git
Then we need a directory for the repositories. I decide to put it in /var/www/. Since I already back up that directory then I don’t need to change my backup configuration.
$ sudo mkdir /var/www/git
$ sudo chown git:git /var/www/git

// And lets make it easy to specify git service paths by creating a symbolic
// link to the repository's top directory:
$ sudo ln -s /var/www/git /gitTo do some testing we need an initial repository. We need to become the git user with sudo. For every repository which we create we go through this process. Typically home users do not make dozens of repositories, so it is not an onerous task. The repository creation process is outlined in the appendix - be sure to look at it.
Here we also do a one-time clean up of the ‘git’ user’s directory - we want to avoid unneeded login configuration files since no one is allowed to login as git except yourself via sudo.
$ sudo -u git /bin/bash
$ cd
$ id
uid=600(git) gid=600(git) groups=600(git)
$ ls -a
drwxr-x--- 2 git  git    57 Jul  7 16:11 .
drwxr-xr-x 5 root root   45 Jul  7 16:11 ..
-rw-r--r-- 1 git  git   220 Jan  6  2022 .bash_logout
-rw-r--r-- 1 git  git  3771 Jan  6  2022 .bashrc
-rw-r--r-- 1 git  git   807 Jan  6  2022 .profile

// remove the bash files to keep the git user's life simple
$ rm .bash* .profileDo not bother with this service if you will not use read-only git pulls.
We install xinetd and configure it to listen for git requests:
// Install xinetd:
$ sudo apt install xinetd

$ systemctl list-unit-files | grep -i xinet
xinetd.service                             generated       -

$ cd /etc/xinet.d/

// Note that none of these services are enabled -- they are traditional
// services from the past.  We will create a 'git' service and enable it:
$ ls
chargen      daytime      discard      echo      servers  time
chargen-udp  daytime-udp  discard-udp  echo-udp  services time-udp

$ sudo touch git
$ sudo nano git
$ cat git
## description: The git dæmon allows git repositories to be exported using \
##       the git:// protocol.

service git
{
        disable         = no
        socket_type     = stream
        wait            = no
        user            = nobody
        flags           = IPv4
        server          = /usr/lib/git-core/git-daemon
        server_args     = --base-path=/var/www/git --syslog --inetd --verbose
        log_on_failure  += USERID
}

$ sudo systemctl restart xinetd
$ systemctl status xinetd
...
Jul 06 13:41:59 pi.home xinetd[175277]: 2.3.15.3 started with libwrap loadavg l>
Jul 06 13:41:59 pi.home xinetd[175277]: Started working: 1 available service
Let’s give it a test. We will clone the test repository, even though it is pretty much empty:
// I clone it on my 'desktop' host.  Since the configuration of the Git service
// already knows the base path to the repositories then we do not add its path
// to the clone URL:
$ git clone git://pi.home/test
Cloning into 'test'...
warning: You appear to have cloned an empty repository.

$ cd test
$ git ls-remote
From git://pi.home/test

// we can remove it; we will test again when the ssh protocol is ready:
$ cd ..
$ rm -rf testFirst we become the ‘git’ user and do 2 things:
We add access to the git user in /etc/ssh/sshd_config:
$ sudo nano /etc/ssh/sshd_config
$ sudo tail -2 /etc/ssh/sshd_config
AllowUsers  myname@192.168.1.* git@192.168.1.* ...
$ sudo systemctl reload sshd
By default ‘git-shell’ does not allow users to ssh into the git server and get access to the command-line – here is an example:
$ ssh git@pi.home
fatal: Interactive git shell is not enabled.
hint: ~/git-shell-commands should exist and have read and execute access.
Connection to pi.home closed.
So we create a script that gives a more informational message:
$ whoami
git
$ cd
$ mkdir git-shell-commands
$ touch git-shell-commands/no-interactive-login
$ chmod 555 git-shell-commands/no-interactive-login
$ nano git-shell-commands/no-interactive-login
$ cat git-shell-commands/no-interactive-login
#!/bin/sh
printf '%s\n' "Hi $USER! You've successfully authenticated, but I do not"
printf '%s\n' "provide interactive shell access."
exit 128
$ exit
So we try to ssh into the server again from the desktop host:
$ ssh git@pi.home
Hi git! You've successfully authenticated, but I do not
provide interactive shell access.
Connection to pi.home closed.
We also need to create a personal .ssh directory and add an authorized_keys file. Then we will add new users’ public ssh keys to this file. This process is detailed in the appendix.
Finally we test the ssh protocol for access to git services:
$ hostname
desktop.home
$ git clone ssh://git@pi.home/git/test
Cloning into 'test'...
warning: You appear to have cloned an empty repository.
$ cd test
$ git ls-remote
From ssh://git@pi.home/git/test

// If you don't like using 'master' as the initial branch name, then you
// can change it.  I did not do that here, but you could change it to 'main'
// with this command:    git config --global init.defaultBranch main

// Let's add something to the test repo:
$ cp -p /path/to/myxt .
$ git add myxt

// When you commit your changes you will be prompted to add a comment
// in your editor of choice (typically 'nano') but for me it is 'vim'.
$ cat ~/.gitconfig
[user]
        name = Your Name
        email = your.name@somewhere.com
[core]
        editor = vim

$ git commit -a
[master (root-commit) 254c31c] - test commit.
 1 file changed, 6 insertions(+)
 create mode 100755 myxt

$ git push origin master
Counting objects: 3, done.
Delta compression using up to 6 threads.
Compressing objects: 100% (2/2), done.
Writing objects: 100% (3/3), 295 bytes | 0 bytes/s, done.
Total 3 (delta 0), reused 0 (delta 0)
To ssh://git@pi.home/git/test
 * [new branch]      master -> master
$ git status
 # On branch master
nothing to commit, working directory cleanNote that gitweb requires a functioning web service on the server; here I assume that the Apache server is installed and running.
First we install and configure gitweb. The Ubuntu gitweb package is just a wrapper for gitweb – instead the actual gitweb files are part of the git package:
$ dpkg -S /usr/share/gitweb
git: /usr/share/gitweb

$ sudo apt install gitweb
...
Setting up gitweb (1:2.34.1-1ubuntu1.9) ...
apache2_invoke: Enable configuration gitweb

// Now we alter '/etc/gitweb.conf' so that it matches our setup:
$ sudo cp -p /etc/gitweb.conf /etc/gitweb.conf.orig
$ sudo nano /etc/gitweb.conf
$ diff /etc/gitweb.conf.orig /etc/gitweb.conf
2c2
< $projectroot = "/var/lib/git";
---
> $projectroot = "/var/www/git";
14a15
> $projects_list = "/git/projects_list_for_homegit";
Before trying to access gitweb in the browser we want to enable the cgi module.
$ sudo a2enmod cgi
Enabling module cgi.
To activate the new configuration, you need to run:
  systemctl restart apache2
We also want to create and maintain a ‘projects_list’ file - this is another thing that you do for each new repository, so its description is found in the appendix.
Once you have a git repository hosted by your Linux server, then you can access it on your Linux server’s web site. Assuming the hostname is pi.home the go to:
https://pi.home/gitweb/
It should look something like this:
Running multiple hosts virtually from the same hardware is very convenient and useful; you might want to:
Running other hosts virtually requires sufficient memory and disk space. Though my Linux server only has 4 GB of memory, I set up an example Rocky Linux 8 virtual host to demonstrate the process. Recall that this server also runs Samba, remote desktops, NFS, Apache, Git and MySQL. It is much better to have 8 GB of memory to start with when implementing virtualization.
Traditionally virtualization is deployed on x86 hardware (your bog standard server room rack server) with Intel or AMD processors, so much of the documentation is geared for those platforms. Systems like the Raspberry Pi with a Broadcom-based SoC4 and ARM processors are relatively new to hardware-based virtualization.
Though there are many choices for virtualization software, here we use the combination of three integrated open source software projects to build and manage running virtual hosts:
Before installing virtualization software packages we can check to be sure that our kernel supports KVM:
// Install cpu-checker on the Raspberry Pi so that we can check for kvm
// capatibilty:
$ sudo apt install cpu-checker
...

$ kvm-ok
INFO: /dev/kvm exists
KVM acceleration can be used

// Compare this to the older Odroid, which is not compatible:
$ kvm-ok
INFO: Your CPU does not support KVM extensions
INFO: For more detailed results, you should run this as root
HINT:   sudo /usr/sbin/kvm-ok
$ sudo kvm-ok
INFO: Your CPU does not support KVM extensions
KVM acceleration can NOT be used

// Back on the Raspberry Pi, here are some other ways to look at kernel
// capabilities.  The currently running kernel has a configuration file
// in /boot which mentions all kernel options configurated:
$ grep CONFIG_KVM /boot/config-$(uname -r)
CONFIG_KVM=y
CONFIG_KVM_MMIO=y
CONFIG_KVM_VFIO=y
CONFIG_KVM_GENERIC_DIRTYLOG_READ_PROTECT=y
CONFIG_KVM_XFER_TO_GUEST_WORK=y

// As well, KVM support is often provided by a kernel module; you can use
// 'modinfo' to query about it. On a Pi it reports that it is 'built-in'
$ modinfo kvm
name:           kvm
filename:       (builtin)
license:        GPL
file:           arch/arm64/kvm/kvm
author:         Qumranet
parm:           halt_poll_ns:uint
parm:           halt_poll_ns_grow:uint
parm:           halt_poll_ns_grow_start:uint
parm:           halt_poll_ns_shrink:uint

// Compare the output to an x86 Ubuntu virtual machine where KVM support is
// provided by a kernel module:
$ modinfo kvm | head
filename:       /lib/modules/5.19.0-46-generic/kernel/arch/x86/kvm/kvm.ko
license:        GPL
author:         Qumranet
srcversion:     637F3CEEFA045C6DB95F67D
depends:
retpoline:      Y
intree:         Y
name:           kvm
vermagic:       5.19.0-46-generic SMP preempt mod_unload modversions
...Before we go further, it is really useful to configure bridge networking. If the host server has a bridging network configuration then any virtual hosts which you install can connect directly to your LAN, and they appear as independent hosts. Otherwise the virtual hosts hide behind the Linux host server’s NAT5 which will forward their traffic to the intended destinations. Other computers on your LAN will not be able to connect to the virtual hosts unless you play with options like port forwarding on the Linux server.
Setting up a bridge is not difficult. Once you do it your server can keep this configuration even if you eventually do not use virtualization services. It is however important to have direct login access to your server in case you make any mistakes and lose your network connection.
Here are the commands which create an ethernet bridge. This example assumes you have manually configured your current network connection first, as described in the appendix. It does not make sense to me to depend on your home router’s DHCP network configuration when creating a bridge.
// Show network connection names and become root
$ nmcli con show --active
NAME                UUID                                  TYPE      DEVICE
ethernet-eth0       bc6badb3-3dde-4009-998d-2dee20831670  ethernet  eth0

$ sudo /bin/bash

// Let's copy the network manager configurations to another place
// If we have problems we can revert back to the previous configuration
# cp -a /etc/NetworkManager /var/tmp/NetworkManager.beforebridge

// We add the bridge interface and give it the name 'br0'
// By default the system names this connection 'bridge-br0' unless you pick
// a different name:
# nmcli con add type bridge ifname br0
Connection 'bridge-br0' (f1e8c688-5b47-4576-ad72-b0e082e34da1) successfully added.

// Assign the ethernet interface to this bridge by modifying the existing
// ethernet connection named ethernet-eth0:
# nmcli con modify ethernet-eth0 master bridge-br0 slave-type bridge
# nmcli con show --active
NAME           UUID                                  TYPE      DEVICE
bridge-br0     f1e8c688-5b47-4576-ad72-b0e082e34da1  bridge    br0
ethernet-eth0  bc6badb3-3dde-4009-998d-2dee20831670  ethernet  eth0
This example uses my IP addresses, MAC addresses, home router gateway and name server configuration. Your configuration will of course be different:
// We want the bridge to have the same MAC address as the ethernet device.
// Remember that you reserved an IP address for your mac address on the
// home router so that only your server uses the IP address:
# nmcli con mod bridge-br0 ethernet.cloned-mac-address e4:5f:01:a7:22:54

// Let's turn off the Spanning Tree Protocol; we don't need it for our
// simple setup:
# nmcli con modify bridge-br0 bridge.stp no

// As we are manually configuring the network configuration, then we set
// the IPv4 address, subnet mask, gateway and DNS for the bridge.
# nmcli con modify bridge-br0 ipv4.method manual ipv4.addresses 192.168.1.90/24 gw4 192.168.1.254
# nmcli con modify bridge-br0 ipv4.dns "1.1.1.1 8.8.8.8 192.168.1.254 75.153.171.67"

// Bring the bridge up; it will take some seconds:
# nmcli con up bridge-br0
Connection successfully activated (master waiting for slaves) ...

# nmcli con show --active
NAME           UUID                                  TYPE      DEVICE
bridge-br0     f1e8c688-5b47-4576-ad72-b0e082e34da1  bridge    br0
ethernet-eth0  bc6badb3-3dde-4009-998d-2dee20831670  ethernet  eth0
If you want to use a bridge-specific utility, you can install bridge-utils so that you have access to the brctl command:
$ sudo apt install bridge-utils
...
$ brctl show
bridge name     bridge id               STP enabled     interfaces
br0 8000.e45f01a7110d no eth0Now we are ready to install the required software. First we install qemu-system-arm. You could also install qemu-kvm, a virtual package, and it will pick the right package to match your architecture, which is qemu-system-arm:
$ sudo apt install qemu-system-arm
...
The following additional packages will be installed:
  ipxe-qemu ipxe-qemu-256k-compat-efi-roms ... qemu-efi-aarch64
  qemu-efi-arm qemu-system-common qemu-system-data qemu-system-gui qemu-utils
...
Created symlink /etc/systemd/system/multi-user.target.wants/qemu-kvm.service ...
Then we install the needed libvirt packages:
$ sudo apt install libvirt-daemon-system libvirt-clients
...
The following additional packages will be installed:
  dmeventd jq libdevmapper-event1.02.1 libjq1 liblvm2cmd2.03 libnss-mymachines
  libonig5 libtpms0 libvirt-clients libvirt-daemon-config-network
  libvirt-daemon-config-nwfilter libvirt-daemon-driver-qemu
  libvirt-daemon-system-systemd libvirt0 libxml2-utils lvm2 mdevctl swtpm
  swtpm-tools systemd-container thin-provisioning-tools
...
Created symlink /etc/systemd/system/multi-user.target.wants/machines.target ...
...
Enabling libvirt default network
Created symlink /etc/systemd/system/multi-user.target.wants/libvirtd.service ...
...
Created symlink /etc/systemd/system/multi-user.target.wants/libvirt-guests.service ...
...
Created symlink /etc/systemd/system/sysinit.target.wants/blk-availability.service ...
Created symlink /etc/systemd/system/sysinit.target.wants/lvm2-monitor.service ...
...
Processing triggers for initramfs-tools (0.140ubuntu13.1) ...
update-initramfs: Generating /boot/initrd.img-5.15.0-1033-raspi
... (a bunch of messages occur whenever update-initramfs is invoked)
We also want virt-manager, a useful management GUI. It will bring in virt-viewer and the virtinst package, which provides virt-install.
$ sudo apt install virt-managerNote that we can install qemu-system-x86, which allows full system emulation of binaries on x86 hardware; that is, i386 and x86_64. However there is no hardware acceleration for those architectures on a Raspberry Pi, so it is too slow to use in any practical way.
// We will not be using the default virtual network, which operates behind
// a NAT.  You might decide to keep the default virtual network if you need
// the NAT for a particular purpose - for example - you purchase a VPN and
// configure one of your virtual hosts to use that VPN.  You would need to
// configure that virtual host to use your NAT.


// Here we show what it is, and then we disable it:
$ virsh net-list
 Name      State    Autostart   Persistent
--------------------------------------------
 default   active   yes         yes

$ virsh net-dumpxml default
<network>
  <name>default</name>
  <uuid>0e5a34e6-85c9-49ba-a38a-7ce4dfe49a34</uuid>
  <forward mode='nat'/>
  <bridge name='virbr0' stp='on' delay='0'/>
  <mac address='52:54:00:05:29:43'/>
  <ip address='192.168.123.1' netmask='255.255.255.0'>
    <dhcp>
      <range start='192.168.123.2' end='192.168.123.254'/>
    </dhcp>
  </ip>
</network>

$ sudo /bin/bash
# virsh net-autostart default --disable
# virsh net-destroy default
# virsh net-undefine default
Network default has been undefined
# virsh net-list --all
 Name   State   Autostart   Persistent
----------------------------------------The default location for virtual hosts’ disks and boot images in in:
The disk space used can be very large, so I prefer to use instead a large data disk which is mounted as /data, in the sub-directory /data/kvm/.
$ df -h /data/
Filesystem      Size  Used Avail Use% Mounted on
/dev/mmcblk0p3  142G   26G  115G  19% /data

$ sudo /bin/bash
# mkdir -p /data/kvm/client-images /data/kvm/boot-isos

// Create pool for virtual host client disk images
# virsh pool-define-as --name clients --type dir --target /data/kvm/client-images
Pool clients defined

// Create pool for boot iso installer images
# virsh pool-define-as --name boot-isos --type dir --target /data/kvm/boot-isos
Pool boot-isos defined

# virsh pool-list --all
 Name        State      Autostart
---------------------------------
 clients     inactive   no
 boot-isos   inactive   no

# virsh pool-start clients
Pool clients started
# virsh pool-start boot-isos
Pool boot-isos started

# virsh pool-autostart boot-isos
Pool boot-isos marked as autostarted
# virsh pool-autostart clients
Pool clients marked as autostarted

// Note that libvirtd always creates a 'default' pool, and sets its
//  path to /var/lib/libvirt/images
// The first time you create a VM the 'default' pool will magically appear.
// Do not select that pool during installation if you have created another
//  pool such as 'clients' here:
# virsh pool-list --all
 Name        State    Autostart
---------------------------------
 boot-isos   active   yes
 clients     active   yes

// Then I assign ownership of the boot images to myself:
$ sudo chown myname:myname /data/kvm/boot-images
$ scp -p desktop:/path/to/ubuntu-22.04.2-live-server-arm64.iso /data/kvm/boot-images/
$ scp -p desktop:/path/to/Rocky-8.8-aarch64-minimal.iso /data/kvm/boot-images/

$ virsh vol-list boot-isos
 Name                                   Path
-----------------------------------------------------------------------------------------------
 Rocky-8.8-aarch64-minimal.iso         /data/kvm/boot-isos/Rocky-8.8-aarch64-minimal.iso
ubuntu-22.04.2-live-server-arm64.iso /data/kvm/boot-isos/ubuntu-22.04.2-live-server-arm64.isoThere are 2 ways to install virtual machines (VMs):
As a demonstration I installed a couple of VMs – one was an Ubuntu 22.04 server, and the other was a Rocky 8.8 Linux minimal server. Of course, both were ARM architectures so that the KVM acceleration capability of the Raspberry Pi’s architecture was used.
Note that all installed VMs are described by XML files, and those XML files can always be found in /etc/libvirt/qemu/.
There are a number of tutorials on the web showing you how to create a new VM using virt-manager, so I do not reproduce the process here.
Note that when you launch virt-manager it always takes some seconds to appear.
Before creating a new VM, create the disk volume that will be its disk. You do this by choosing ‘Edit’ and then ‘Connections Details’. Click on the ‘Storage’ tab and add a volume under the correct filesystem directory, which is clients in my example in this chapter.
Installing an Ubuntu server VM works with 1024 MB (though I chose 1534 MB of RAM), and a disk size of 20 GB. I chose to install ‘Ubuntu Server’ rather than the minimized server during the installation dialog.
It is very useful to always select ‘Customize configuration before install’ on the last panel when creating a new VM. Then you can look at the VM details and change things before beginning the installation, such as:
The command-line utility virt-install is very useful. It is best done in a script because of the large number of options, but here is an example of using it to install Rocky Linux.
// This one had an issue falling into an EFI shell at installation startup.
// I fixed it with a ghastly set of options for the boot loader.  Trying the
// installation with virt-manager also required an unexpected option for
// the firmware option in order to get past the EFI shell.

// I set variables for the boot 'loader' path and for the 'nvram' path, so that
// the command below is less intimidating.  The man-page for virt-install
// suggests trying this to see all the boot options:
//    virt-install --boot=?
# loader="/usr/share/AAVMF/AAVMF_CODE.fd"
# nvram="/usr/share/AAVMF/AAVMF_VARS.fd"
# virt-install --virt-type kvm --name rocky8 --arch aarch64 \
 --ram 1534 \
 --boot uefi \
 --boot loader=$loader,loader.readonly=yes,loader.type=pflash,nvram=$nvram \
 --cdrom /data/kvm/boot-isos/Rocky-8.8-aarch64-minimal.iso \
 --network bridge:br0,mac=52:54:00:FF:00:04 \
 --nographics \
 --accelerate \
--disk path=/data/kvm/clients/rocky8.2.qcow2,size=20In a Linux system it is important to correctly identify storage devices, especially when you want to repartition or reformat them. If you pick the wrong device you might wipe out its data.
Start with lsblk to list all current block (storage) devices. Note that a microSD card in a microSD slot will be identified with a name starting with /dev/mmcblk. But if you insert the microSD card into a multi-slot USB-based card reader then the Linux kernel will identify any kind of inserted card in the reader as a generic ‘scsi disk’ type and it will appear with a name which starts with /dev/sd.
Here is an example of a Pi that has 3 storage disks and a USB card reader with 4 slots. The lsblk command also shows active mount points. The 3 disks are:
# lsblk -i
NAME        MAJ:MIN RM   SIZE RO TYPE MOUNTPOINTS
sda           8:0    1 238.5G  0 disk
`-sda1        8:1    1 238.5G  0 part /usbdata
sdb           8:16   1     0B  0 disk
sdc           8:32   1     0B  0 disk
sdd           8:48   1     0B  0 disk
sde           8:64   1 231.7G  0 disk
|-sde1        8:65   1   243M  0 part
`-sde2        8:66   1   5.9G  0 part
mmcblk0     179:0    0  59.4G  0 disk
|-mmcblk0p1 179:1    0   243M  0 part /boot/firmware
`-mmcblk0p2 179:2    0  59.2G  0 part /

# fdisk -l /dev/sde
Disk /dev/sde: 231.68 GiB, 248765218816 bytes, 485869568 sectors
Disk model: FCR-HS3       -3
...
Disklabel type: dos
Disk identifier: 0x11d94b9e

Device     Boot  Start      End  Sectors  Size Id Type
/dev/sde1  *      2048   499711   497664  243M  c W95 FAT32 (LBA)
/dev/sde2       499712 12969983 12470272  5.9G 83 Linux

# parted /dev/sde print
Model:  FCR-HS3 -3 (scsi)
Disk /dev/sde: 249GB
Sector size (logical/physical): 512B/512B
Partition Table: msdos
Disk Flags:

Number  Start   End     Size    Type     File system  Flags
 1      1049kB  256MB   255MB   primary  fat16        boot, lba
 2      256MB   6641MB  6385MB  primary  ext4
You can pass options to the lsblk command so that you print out columns you are interested in – try lsblk --help to see other options.
# lsblk -i -o 'NAME,MODEL,VENDOR,SIZE,MOUNTPOINT,FSTYPE'
NAME        MODEL       VENDOR     SIZE MOUNTPOINT     FSTYPE
sda         Extreme Pro SanDisk  238.5G
`-sda1                           238.5G /usbdata       ext4
sdb         FCR-HS3 -0               0B
sdc         FCR-HS3 -1               0B
sdd         FCR-HS3 -2               0B
sde         FCR-HS3 -3           231.7G
|-sde1                             243M                vfat
`-sde2                             5.9G                ext4
mmcblk0                           59.4G
|-mmcblk0p1                        243M /boot/firmware vfat
`-mmcblk0p2 59.2G / ext4This is a generic approach to creating an installation image on removable media; it generally works for various Linux distributions.
// create a directory for downloaded images
$ mkdir raspberry-pi-images
$ cd raspberry-pi-images

// Use wget to pull the compressed image into our directory
// (The web page also shows the file checksum so that you can verify
//  that the compressed file is not corrupted)
$ serverpath="https://releases.ubuntu-mate.org/jammy/arm64"
$ compressed="ubuntu-mate-22.04-desktop-arm64+raspi.img.xz"
$ wget -N -nd $serverpath"/"$compressed
$ sha256sum ubuntu-mate-22.04-desktop-arm64+raspi.img.xz
3b538f8462cdd957acfbab57f5d949faa607c50c3fb8e6e9d1ad13d5cd6c0c02 ...

// uncompress the file so we can write the image file to our microSD.
// the 1.9 GB compressed file uncompressed to 6.2 GB:
$ xz -dv ubuntu-mate-22.04-desktop-arm64+raspi.img.xz
ubuntu-mate-22.04-desktop-arm64+raspi.img.xz (1/1)
 5.1 %      95.2 MiB / 404.4 MiB = 0.235    35 MiB/s     0:11   3 min 40 s
 ...
 100 %   1,847.8 MiB / 6,333.0 MiB = 0.292  27 MiB/s     3:50
Now plug in the microSD card, identify the microSD card device name, and then use the dd command to write the image to it. Safely remove the device when you are done with the eject command. In this example the device name /dev/sdX is not real; it is a place-holder for your real device name:
$ img="ubuntu-mate-22.04-desktop-arm64+raspi.img"
$ sudo dd if=$img of=/dev/sdX bs=32M conv=fsync status=progress
$ sudo eject /dev/sdXIf you modify the microSD’s partitioning before you start the installation then you can reserve a portion of the disk for special data usage - for example as a shared Samba area or an NFS area. We do this by expanding the main Linux partition up to 40 GB, and then we create a third partition.
I show here how to do that from another Linux computer (in my case another Pi) with a USB card reader and an inserted 256 GB microSD card.
There is a good graphical tool named gparted which is easy to use – beginners should certainly use it. It is great when managing a handful of servers (it is a different story if you are managing dozens or thousands of servers).
Here are a few gparted notes:
As always, I show the command-line example in this section. As a bonus it shows a common problem of dealing with partition alignment when manually editing partitions. Skip the rest of this section if you have opted for gparted.
Here are some common command-line tools to help us:
Here are some utilities used to find disk information:
First we need to identify the device name, and then we use that device name in the partitioning tool. In my test situation I am using /dev/sde and I am targeting the main Linux (second) partition: /dev/sde2.
40 GB is lots of space for future system needs, so I decide to expand the second partition from 6 up to 40 GB.
To be sure this partition is sound I run a check on it with e2fsck. Then I use parted to expand the partition, and then resize2fs which can adjusts the size of the underlying ext4 file system.
// run a file system check on the target partition:
$ sudo e2fsck /dev/sde2
e2fsck 1.46.5 (30-Dec-2021)
writable: clean, 224088/390144 files, 1485804/1558784 blocks

// invoke the partitioning tool *parted*, print the partition table
// for reference, and then resize the second partition:
$ sudo parted /dev/sde
...
(parted) print
...
Number  Start   End     Size    Type     File system  Flags
 1      1049kB  256MB   255MB   primary  fat16        boot, lba
 2      256MB   6641MB  6385MB  primary  ext4

(parted) resizepart
Partition number? 2
End?  [6641MB]? 40G

(parted) print
...
Number  Start   End     Size    Type     File system  Flags
 1      1049kB  256MB   255MB   primary  fat16        boot, lba
 2      256MB   40.0GB  39.7GB  primary  ext4

(parted) quit

// Now expand the underlying file system to the end of the partition
$ sudo resize2fs /dev/sde2
resize2fs 1.46.5 (30-Dec-2021)
Resizing the filesystem on /dev/sde2 to 9703161 (4k) blocks.
The filesystem on /dev/sde2 is now 9703161 (4k) blocks long.Now we want to create a third large partition. We run into the problem of partition alignment because I chose 40 GB for the second partition expansion without considering alignment for the next partition.
// invoke *parted* and print the partition table in sector units:
$ sudo parted /dev/sde
...
(parted) unit s print
Model:  FCR-HS3 -3 (scsi)
Disk /dev/sde: 485869568s
Sector size (logical/physical): 512B/512B
Partition Table: msdos
Disk Flags:

Number  Start    End        Size       Type     File system  Flags
 1      2048s    499711s    497664s    primary  fat16        boot, lba
 2      499712s  78125000s  77625289s  primary  ext4

// the 'End' of the second partition is at 78125000 sectors, so I increment
// that number and try to create the third partition up to 100% of the disk
// There is a warning about partition alignment, so I cancel that operation
(parted) mkpart primary ext4 78125001 100%
Warning: The resulting partition is not properly aligned for best performance:
78125001s % 2048s != 0s
Ignore/Cancel? c
Disk technology has evolved considerably. Block devices traditionally had a default 512 byte sector size (a sector is the minimum usable unit), but newer disks may have a 4096 (4k) sector size. In order to work efficiently with different sector sizes on various disk technologies a good starting point is at sector 2048. This is at 1 mebibyte (MiB), or 1048576 bytes into the disk, since 512 bytes * 2048 sectors is 1048576 bytes. You lose a bit of disk space at the ‘front’ of the disk, but partitioning and file system data structures are better aligned, and disk performance is enhanced.
// To calculate the best starting sector number for an aligned new
//  partition simply calculate:
//  TRUNCATE(FIRST_POSSIBLE_SECTOR / 2048) * 2048 + 2048
//  thus: 78125001 / 2048 = 38146.973144
//        TRUNCATE(38146.973144) = 38146
//        (38146 * 2048) + 2048  = 78125056

(parted) mkpart primary ext4 78125056 100%
(parted) print unit s
...
Number  Start   End     Size    Type     File system  Flags
 1      1049kB  256MB   255MB   primary  fat16        boot, lba
 2      256MB   40.0GB  39.7GB  primary  ext4
 3      40.0GB  249GB   209GB   primary
(parted) align-check optimal 3
3 aligned

(parted) unit s print free
...
Number  Start      End         Size        Type     File system  Flags
        32s        2047s       2016s                Free Space
 1      2048s      499711s     497664s     primary  fat16        boot, lba
 2      499712s    78125000s   77625289s   primary  ext4
        78125001s  78125055s   55s                  Free Space
 3      78125056s  485869567s  407744512s  primary

(parted) quit
Though we have now a bit of wasted space between partition 2 and 3, we can extend partition 2 to use that space. We need to resize its ext4 file system after:
// first check the file system:
$ sudo e2fsck /dev/sde2
e2fsck 1.46.5 (30-Dec-2021)
writable: clean, 224088/2414016 files, 1615846/9703161 blocks

$ sudo parted /dev/sde
...
(parted) unit s print free
...
Number  Start      End         Size        Type     File system  Flags
        32s        2047s       2016s                Free Space
 1      2048s      499711s     497664s     primary  fat16        boot, lba
 2      499712s    78125000s   77625289s   primary  ext4
        78125001s  78125055s   55s                  Free Space
 3      78125056s  485869567s  407744512s  primary

(parted) resizepart
Partition number? 2
End?  [78125000s]? 78125055s
(parted) print free
...
Number  Start      End         Size        Type     File system  Flags
        32s        2047s       2016s                Free Space
 1      2048s      499711s     497664s     primary  fat16        boot, lba
 2      499712s    78125055s   77625344s   primary  ext4
 3      78125056s  485869567s  407744512s  primary

(parted) quit
Information: You may need to update /etc/fstab.

$ sudo resize2fs /dev/sde2
resize2fs 1.46.5 (30-Dec-2021)
Resizing the filesystem on /dev/sde2 to 9703168 (4k) blocks.
The filesystem on /dev/sde2 is now 9703168 (4k) blocks long.Ubuntu uses the ext4 file system, so let’s create that file system on the new data partition:
$ sudo mkfs.ext4 /dev/sde3
mke2fs 1.46.5 (30-Dec-2021)
Creating filesystem with 50968064 4k blocks and 12746752 inodes
Filesystem UUID: 2dba1eef-34e4-47ed-90fc-c1938d5fa9e0
Superblock backups stored on blocks:
    32768, 98304, 163840, 229376, 294912, 819200, 884736, 1605632, 2654208,
    4096000, 7962624, 11239424, 20480000, 23887872

Allocating group tables: done
Writing inode tables: done
Creating journal (262144 blocks): done
Writing superblocks and filesystem accounting information: done
By default, the generations of the ext file systems reserve 5% of the available space for the root user. On a data partition where most files created will belong to ordinary users this reservation is not necessary. 5% of 200 GB is 10 GB - that is a lot of space. So it is a good idea to reduce the percentage to 1%; do this with the tune2fs utility:
$ sudo tune2fs -l /dev/sde3 | grep -i count
...
Reserved block count:     2548403

$ sudo tune2fs -m 1 /dev/sde3
tune2fs 1.46.5 (30-Dec-2021)
Setting reserved blocks percentage to 1% (509680 blocks)

$ sudo tune2fs -l /dev/sde3 | grep -i count
...
Reserved block count:     509680
Lastly, let’s add a label to this partition to make it easier to mount the file system in the future. We will use the label PI-DATA:
$ sudo tune2fs -L PI-DATA /dev/sde3
tune2fs 1.46.5 (30-Dec-2021)If you did not modify the initial partitioning of your microSD card then you will simply make a directory in the root of your file system where we will store any data associated with a Samba service or with an NFS service – that is all.
In case you did make a data partition on the microSD card then we still need to make a directory in the root of the file system to mount that data partition:
Let’s call the directory /data:
$ sudo mkdir /dataFor the case with the third (data) partition then we need to mount it and make the mount action permanent on reboots. For this we create an entry in the file system table, the /etc/fstab file:
// make a backup copy first
$ sudo cp -p /etc/fstab /etc/fstab.orig

// There are 6 fields in an fstab entry:
//    1. the partition name, the partition label or the partition uuid
//    2. the directory to use for the mount point
//    3. the file system type
//    4. any mount options recognized by the mount command
//    5. use a zero here, it is a legacy option for the 'dump' command
//    6. the file system check ordering, use '2' here

// Edit the file, adding a mount entry line to the end of the file;
// recall that we added the label 'PI-DATA' to its file system:
$ sudo nano /etc/fstab
$ tail -2 /etc/fstab
LABEL=PI-DATA       /data           ext4    defaults  0  2

$ sudo mount /data
$ ls -la /data
total 24
drwxr-xr-x  3 root root  4096 Apr 16 10:35 .
drwxr-xr-x 20 root root  4096 Apr 16 14:30 ..
drwx------  2 root root 16384 Apr 16 10:35 lost+found

$ df -h /data
Filesystem      Size  Used Avail Use% Mounted on
/dev/sde3 191G 28K 189G 1% /data| Command | Purpose |
|---|---|
| whoami | Shows your login name |
| id | Shows your UID and GID numbers and all of your group memberships |
| pwd | Shows your current working directory |
| ls | Shows a listing of your current directory |
| ls -l | Shows a detailed listing of your current directory |
| ls / | Shows a listing of the base of the file system |
| ls /root | Try to show a listing of the super-user’s protected home directory |
| sudo ls /root | ‘sudo’ allows you to be root temporarily. It will ask for your password |
| man sudo | Shows the manual page for the sudo command (type q to quit) |
| date | Shows the current date and time |
| cat /etc/lsb-release | Shows the contents of this file |
| uptime | Shows how long this computer has been up |
| cd /tmp | Change directories to the ‘tmp’ directory |
| touch example | Creates a new (and empty) file named ‘example’ |
| rm -i example | Removes the file named ‘example’ if you respond with: y |
| mkdir thisdir | Creates a new directory named ‘thisdir’ |
| mkdir --help | Shows help on using the mkdir command |
| rmdir thisdir | Removes the directory named ‘thisdir’ |
| cd | Without an argument, it takes you back to your home |
| file .bash* | Shows what kind of files whose names start with ‘.bash’ |
| echo $SHELL | Shows what shell you use |
| env | sort | less | Shows your environment variables, sorted by name (q to quit) |
The last example in the above list:
env|sort|less
is actually 3 different commands piped together: - env - output the environment variables in your shell - sort - sort the incoming text, by default alphabetically - less - show the output a page at a time
A pipe, represented by a vertical line, sends the output from one command as the input for the next command. It is a hallmark of the UNIX way of doing things - create small programs that do one thing well, and string the commands together to accomplish a larger task.
Here are a series of exercises you can try on a fresh installation of the MATE desktop. By default, the initial mate configuration has 2 panels (taskbars):
You may like this setup; but here is a small exercise to give you a quick start in making modifications.
The ‘Maximize Window’ button (between the ‘Minimize Window’ button and the ‘Close Window’ on the right of each window) has difference actions depending on which mouse-click you use:
There are many ways to do backups - this is one example.
An example script in my github ‘tools’ area can do local system backups; it can also do external backups to a removable drive, such as an attached USB drive. If you do only local backups without creating a copy elsewhere then you run the risk of losing your data because of a major failure (like losing or overwriting the local disk) when you don’t have another copy.
As well the script can handle large directories by using rsync to copy them them to a removable drive. Though ‘rsync’ is typically used for remote copies it can also be used locally.
The script also allows you to keep an additional copy of your large directories on the removable drive.
The example script requires a few configuration entries into a file named /etc/system-backup.conf. You need a designated local directory; the files will be compressed so it requires only a few hundred megabytes per day for each day of the week. The provided example script also keeps the last week of each month for one year. If you use the external backup feature and/or the large directory backup feature then you simply need to provide the partition on the drive to use for backups, as well as the mounted name of the directories where the files will be copied.
In order to automate your backup script, you also need to create a cronjob which will automatically run your script in the time slot you pick. In the example below you:
* create the needed local directories specified in /etc/system-backup.conf
* edit the configuration file if you choose different directory names
* copy the configuration file and the script into place
* run the script in test mode to check configuration correctness
* create/edit the cronjob to run the local backup at 1 in the early morning
// Create local directory with permissions limiting access to
// backed-up files to users in the 'adm' group:
$ sudo mkdir /var/local-backups
$ sudo chown root:adm /var/local-backups
$ sudo mkdir /var/log/local-backups
$ sudo chown root:adm /var/local-backups
// Protect the backup directory by removing permissions for others:
$ sudo chmod o-rwx /var/local-backups
// Copy the configuration file to /etc/ and the shell script to /root/bin/
$ sudo cp /path/to/system-backup.conf /etc
$ sudo mkdir /root/bin
$ sudo cp /path/to/system-backup.sh /root/bin/
// The script must be marked as 'executable'; the chmod command will do that:
$ sudo chmod 755 /root/bin/system-backup.sh
// Edit the configuration file for the backups:
$ sudo nano /etc/system-backup.conf
// Run the script in debug mode from the command line to make sure
// that everything is correctly configured:
$ sudo /root/bin/system-backup.sh --test --local
// Create and edit the cronjob -- this example would run at 01:00 hrs
$ EDITOR=/bin/nano sudo crontab -e
// ( On Ubuntu 'crontab' puts cron-job files in /var/spool/cron/crontabs/ )
// Ask 'crontab' to list what that job is:
$ sudo crontab -l | tail -3
0 1 * * * /root/bin/system-backup.sh --localIf you will also synchronize backups to a USB drive, then you must make directories at the root of the USB file system for backups. The USB partition name and the names of the directories must match the configuration file setup. (example: your USB partition is /dev/sda1 and so you have set ‘usbpartition’ in the configuration file to ‘sda1’)
// Here we also prepare for doing large directory rsyncs as well:
$ sudo mount /dev/sda1 /mnt
$ cd /mnt
$ sudo mkdir backups rsyncs
$ sudo mkdir rsyncs/copy

// Be sure to unmount the drive
$ cd
$ sudo umount /mnt

// Run the script in debug mode from the command line to make sure
// that everything is correctly configured for external copies of your
// local backups (that is, the ones in /var/local-backups/):
$ sudo /root/bin/system-backup.sh --test --external

// If you will also do large directory backups then test that option
// as well.  You must have set 'largedirs' in the configuration file:
$ sudo /root/bin/system-backup.sh --test --rsync-large

// Finally edit the cronjob and add the external backup options to the command:
$ EDITOR=/bin/nano sudo crontab -e
$ sudo crontab -l | tail -3

0 1 * * * /root/bin/system-backup.sh --local --external --rsync-large
In case your USB drive is formatted for Windows then it should be okay for all backups except for the large directories backup; that is, with the option ‘–rsync-large’.
The script might issue some warnings about trying to preserve LINUX permissions on the USB drive, but should otherwise work. I need to verify this case. You may have to change the rsync arguments in the script from -aux to -rltux. I need to test the Windows-formatted usb drive option!!.
If you ever need to restore files from your backups then you should unpack the tar file (compressed ‘tar’ files are sometimes called tarballs) on a Linux system and copy the needed files into place on the file system.
There are some common networking files that are interesting to configure especially if you have more than one Linux computer on your home network. They are useful on your home Linux server as well, since it clarifies some configuration settings for some future services you might like to enable, for example, a web service.
You can only configure the hosts file if you have reserved IP addresses in your home router for your special devices, like your home Linux server.
The list of files that I like to manage are:
Your router’s private network address is used when declaring your home domain; the private network is typically something like 192.168.1.0 or 10.0.0.0. I did a quick analysis of a list of the IP addresses of common routers. The network address of the router is usually obtained by dropping the last octet from its IP address. The top 4 network addresses (without a trailing .0) were:
Note that your home network’s IPv4 address space is always in the private network space – that is, network traffic addressed to devices in a private network is never routed over the Internet.
The Ubuntu version of the /etc/hosts file automatically puts your hostname within the ‘localhost’ network during installation; we will comment that out.
Here are the examples:
// File: /etc/networks
// You can look at your router's management web page to understand
// what your network address is - the example used here is: 192.168.1.0
// You can drop the last octet, that is the '.0', but I leave it in:

$ man networks
$ sudo cp -p /etc/networks /etc/networks.orig
$ sudo nano /etc/networks
$ cat /etc/networks
link-local 169.254.0.0
home  192.168.1.0

$ diff /etc/networks.orig /etc/networks
2a3
> home  192.168.1.0

// File: /etc/hosts
// Add your favourite devices with their reserved hostnames to /etc/hosts
// Each host gets it full name with .home attached, as well as its short name
// and any aliases:

$ man hosts
$ sudo cp -p /etc/hosts /etc/hosts.orig
$ sudo nano /etc/hosts
$ diff /etc/hosts.orig /etc/hosts
2c2
< 127.0.1.1     pi
---
> #127.0.1.1    pi
9a10,13
>
> 192.168.1.90  pi.home pi www
> 192.168.1.65  desktop.home desktop
> 192.168.1.80  odroid.home odroid
> 192.168.1.81  laptop.home laptop
> 192.168.1.86 inkjet.home inkjetNow that we have a .home domain we can rename our server’s hostname. Suppose the server was originally named pi during the installation:
// Ask what your hostname currently is:
$ hostname
pi

// Use 'hostnamectl' to give the server a fully-qualified hostname by
// adding on the domain name.
$ sudo hostnamectl hostname pi.home

$ hostname
pi.homeWell-known traditional command-line tools for querying DNS 6 are:
These tools look in /etc/resolv.conf for the nameserver(s) to query when looking up IP addresses or hostnames.
Of course, external DNS servers know nothing about your private local network. So, when you try querying a private host using one of the above utilities, you might see:
$ host pi.home
pi.home has address 192.168.1.90
Host pi.home not found: 3(NXDOMAIN)
The ‘host’ command looked at the /etc/hosts file, but might also consulted the listed nameservers. This is because it consults an important file named /etc/nsswitch.conf which configures the order to try when looking up host and other data. Because ‘files’ is first, the daemon consults /etc/hosts before doing any dns request:
$ grep hosts /etc/nsswitch.conf
hosts:          files mdns4_minimal [NOTFOUND=return] dns
There is another command-line tool – getent – for looking up local dns data, and does not consult nameservers:
$ getent hosts pi
192.168.1.90   pi.home pi web
$ getent hosts 192.168.1.90
192.168.1.90   pi.home pi
Contemporary Linux version’s using systemd-resolvd handle this case better since it acts as a local nameserver that handles local DNS lookups, especially local IP address lookups. However it still whines about hostname looks, though it returns the correct local lookup anyway:
// Try from another ubuntu host:

$ hostname
ubuntu.home

$ host pi
pi has address 192.168.1.90
Host pi not found: 3(NXDOMAIN)
$ echo $?
1

$ host 192.168.1.90
90.1.168.192.in-addr.arpa domain name pointer pi.


// Now from the pi host - NOTE that it will not emit an NXDOMAIN message
// for its own hostname, and thus will return success, which is '0':

$ hostname
pi.home

$ host pi
pi has address 192.168.1.90
$ echo $?
0The resolver file would typically be created at bootup when your computer makes a DHCP request to the home router asking for an IP address and the names of the router’s configured DNS servers.
On contemporary Linux versions the resolver file is created and managed differently than in older Linux versions. Recent Ubuntu LTS versions use a systemd service named systemd-resolved which by default manages the resolver file, and it runs a local DNS server:
// list open network connections and find a name match for 'resolve'
# lsof -i -P -n +c0 | grep resolve
systemd-resolve  568 systemd-resolve   13u  IPv4  20701      0t0  UDP 127.0.0.53:53
systemd-resolve  568 systemd-resolve   14u  IPv4  20702      0t0  TCP 127.0.0.53:53 (LISTEN)

// This is what the resolver file looks like on a newly installed Ubuntu node
$ tail -3 /etc/resolv.conf
nameserver 127.0.0.53
options edns0 trust-ad
search .

// The resolver file might actually be a symbolic link into territory owned by
//  systemd -- check the status of this file in your installation:
$ ls -l /etc/resolv.conf
lrwxrwxrwx 1 root ... Mar 17 14:38 /etc/resolv.conf -> ../run/systemd/resolve/stub-resolv.conf

// get the resolver's status -- in this example the first DNS server is
// my router's IP address
$ resolvectl status
Global
       Protocols: -LLMNR -mDNS -DNSOverTLS DNSSEC=no/unsupported
resolv.conf mode: stub

Link 2 (eth0)
    Current Scopes: DNS
         Protocols: +DefaultRoute +LLMNR -mDNS -DNSOverTLS DNSSEC=no/unsupported
Current DNS Server: 192.168.1.254
       DNS Servers: 192.168.1.254 75.153.171.67
Sometimes you want to modify the list of external DNS servers – for example – the DNS servers used by my router have ‘slow’ days, so I like to have control over the list of DNS servers to fix this issue. Here is a look at the process.
Create a local copy of the resolver file - do not pollute systemd space:
// Remove the current resolver file, in case it is a symbolic link:
$ sudo rm /etc/resolv.conf

// Get a copy of /usr/lib/systemd/resolv.conf for manual control of the resolver
$ sudo cp -p /usr/lib/systemd/resolv.conf /etc/resolv.conf

// Change only the comments at the top to show it is locally managed:
$ sudo nano /etc/resolv.conf

$ tail -3 /etc/resolv.conf
nameserver 127.0.0.53
options edns0 trust-ad
search .
By default this version of Ubuntu uses NetworkManager for network configuration, and the local systemd-resolved for DNS service. To make a permanent change to the DNS information known to systemd we configure NetworkManager using its management utility nmcli:
// Look at current network connection configurations - I have not yet deleted
// my old wireless network configuration (it is not active).
// You can delete it with:  nmcli con del 'MY-SSID'
$ nmcli connection show
NAME                UUID                                  TYPE      DEVICE
Wired connection 1  91591311-3c9a-3541-8176-29a8b639fffa  ethernet  eth0
MY-SSID             924de702-7f7e-4e31-8dff-4bc968148f2b  wifi      --

$ nmcli con show 'Wired connection 1' | grep -i dns
connection.mdns:                        -1 (default)
connection.dns-over-tls:                -1 (default)
ipv4.dns:                               --
ipv4.dns-search:                        --
ipv4.dns-options:                       --
...
IP4.DNS[1]:                             192.168.1.254
IP4.DNS[2]:                             75.153.171.67
Now we add some other DNS servers to this configuration using nmcli; it should persist after a reboot. We are adding well-known public IP addresses from Cloudflare (1.1.1.1), and from Google (8.8.8.8):
$ sudo nmcli con modify 'Wired connection 1' ipv4.dns "1.1.1.1,8.8.8.8"
$ nmcli con show 'Wired connection 1' | grep -i dns
connection.mdns:                        -1 (default)
connection.dns-over-tls:                -1 (default)
ipv4.dns:                               1.1.1.1,8.8.8.8
ipv4.dns-search:                        --
...
IP4.DNS[1]:                             1.1.1.1
IP4.DNS[2]:                             8.8.8.8
IP4.DNS[3]:                             192.168.1.254
IP4.DNS[4]:                             75.153.171.67

// Check it with resolvectl:
$ resolvectl status | grep 'DNS Serv'
Current DNS Server: 1.1.1.1
       DNS Servers: 1.1.1.1 8.8.8.8 192.168.1.254 75.153.171.67
If ever you want to make a temporary change, use ‘resolvctl’ to do that; it will not persist after a reboot:
// Here the Pi's ethernet device name is 'eth0'
$ sudo resolvectl dns eth0 9.9.9.9 8.8.4.4 75.153.171.67

$ resolvectl status
Global
       Protocols: -LLMNR -mDNS -DNSOverTLS DNSSEC=no/unsupported
resolv.conf mode: foreign
      DNS Domain: ~.

Link 2 (eth0)
    Current Scopes: DNS
         Protocols: +DefaultRoute +LLMNR -mDNS -DNSOverTLS DNSSEC=no/unsupported
Current DNS Server: 9.9.9.9
DNS Servers: 9.9.9.9 8.8.4.4 75.153.171.67Sometimes you want full control of your Linux server’s network setup and you decide to eliminate the DHCP network configuration and manually configure your network parameters. Remember though that you can only configure specific IP addresses if you have reserved them in your home router.
// Look at the current connection information:
$ nmcli con show --active
NAME                UUID                                  TYPE      DEVICE
Wired connection 1  91591311-3c9a-3541-8176-29a8b639fffa  ethernet  eth0

// Create a new connection definition with the NetworkManager configuration
// tool.  Here we add the IPv4 address with the usual '/24' subnet indicator
// for common home 'Class C' networks, the gateway and your list of DNS
// servers.  In this case my IP address is 192.168.1.90 and my gateway is
// 192.168.1.254

$ sudo nmcli con add \
 type ethernet \
 con-name 'ethernet-eth0' \
 ifname eth0 \
 ipv4.method manual \
 ipv4.addresses 192.168.1.90/24 \
 gw4 192.168.1.254 \
 ipv4.dns "1.1.1.1 8.8.8.8 192.168.1.254 75.153.171.67"
Connection 'ethernet-eth0' (bc6badb3-3dde-4009-998d-2dee20831670) successfully added.

$ nmcli con show
NAME                UUID                                  TYPE      DEVICE
Wired connection 1  91591311-3c9a-3541-8176-29a8b639fffa  ethernet  eth0
ethernet-eth0       bc6badb3-3dde-4009-998d-2dee20831670  ethernet  --

// Now we bring up the new connection; this automatically sets the old
// connection method as 'not active'.  We delete the old connection method:
$ sudo /bin/bash
# nmcli con up id ethernet-eth0
# nmcli con show
NAME                UUID                                  TYPE      DEVICE
ethernet-eth0       bc6badb3-3dde-4009-998d-2dee20831670  ethernet  eth0
Wired connection 1  91591311-3c9a-3541-8176-29a8b639fffa  ethernet  --
# nmcli con del 'Wired connection 1'
// We reboot to test subsequent network state:
# rebootYou might run into a chicken-and-egg problem occasionally because you need to do something like:
Then you realize that you need to be logged in as a regular user to sudo to root, but you cannot be logged in to accomplish your task.
One solution is to set a password for the root user - you can always disable the password afterwards.
This is an example of setting a password for root – as always you set a strong password:
// Normally password access is locked in /etc/shadow - we unlock it when
// we set a password:
$ man passwd
$ man 5 passwd
$ sudo /bin/bash
# id
uid=0(root) gid=0(root) groups=0(root)
# head -1 /etc/shadow
root:!:19476:0:99999:7:::
# passwd
New password:
Retype new password:
passwd: password updated successfully

// We now see an encrypted password in the password field in the shadow file:
# head -1 /etc/shadow
root:$y$j9T$FFNwo6b8WAoEu...tQQhPaSIumPjNPXjWAe7h2M4:19519:0:99999:7:::
Now we can log in directly as root at the server’s text console; remember that it is foolish to login as ‘root’ to a graphical environment. Using web browsers as ‘root’ is not smart.
To lock the root user from using a password, use the -l option; you can unlock it in the future with the -u option.
// lock it:
# passwd -l root
passwd: password expiry information changed.

# head -1 /etc/shadow
root:!$y$j9T$FFNwo6b8WAoEu...tQQhPaSIumPjNPXjWAe7h2M4:19519:0:99999:7:::Another solution is to allow another device in your home network to have secure-shell access to the root account on your Ubuntu server or desktop. It is mentioned briefly in the secure-shell section of this guide, but I summarize the main options here.
The secure-shell daemon must be installed and running on the target device. In /etc/ssh/sshd_config add the remote device’s IP address with root@ prefixing it to the ‘AllowUsers’ rule. Here access to the root account is allowed from 192.168.1.65:
# id
uid=0(root) gid=0(root) groups=0(root)
# grep AllowUsers /etc/ssh/sshd_config
AllowUsers      myname@192.168.1.* root@192.168.1.65 *@localhost
Then root’s /root/.ssh/authorized_keys file must specifically allow the remote device; in this case we use the *from=’‘* option (see the man page for ’authorized_keys’). As well, if you also allow localhost (127.0.0.1) you would allow your login account to ssh locally to root:
# tail -1 ~/.ssh/authorized_keys
from="127.0.0.1,192.168.1.65" ssh-rsa AAAAB3...6oLYnLx5d myname@somewhere.com

$ whoami
myname

$ ssh -A -Y root@localhost
Last login: Tue Jun 13 15:10:42 2023 from desktop.home
# ps -ef --forest|grep ssh
root       685       1  May26 ?      00:00:00 sshd: /usr/sbin/sshd -D [listener] ...
root    395328     685  09:27 ?      00:00:00  \_ sshd: myname [priv]
myname  395330  395328  09:27 ?      00:00:00  |   \_ sshd: myname@pts/0
myname  395414  395331  09:29 pts/0  00:00:00  |           \_ ssh -A -Y root@localhost
root    395415     685  09:29 ?      00:00:00  \_ sshd: root@pts/1
root    395460  395429  09:30 pts/1  00:00:00          \_ grep --color=auto ssh
myname 3693 1 May26 ? 00:00:00 ssh-agentThis is a list of small tasks that you as the git manager must do for each new repository that you host on your Git server:
$ sudo -u git /bin/bash

// Let's go ahead and create a git repository named 'test'.
// We do this by using the git 'init' command:
$ cd /git
$ git --bare init test.git
hint: Using 'master' as the name for the initial branch. This default branch name
hint: is subject to change. To configure the initial branch name to use in all
hint: of your new repositories, which will suppress this warning, call:
hint:
hint:   git config --global init.defaultBranch <name>
hint:
hint: Names commonly chosen instead of 'master' are 'main', 'trunk' and
hint: 'development'. The just-created branch can be renamed via this command:
hint:
hint:   git branch -m <name>
Initialized empty Git repository in /var/www/git/test.git/

$ ls -l
drwxr-xr-x 7 git git 4096 Jul  6 14:52 test.git

// Create the symbolic link without the 'git' extension
$ ln -s test.git test

// We create a repository description, and we export the repository so that
// it is visible:
$ nano test.git/description
$ cat test.git/description
This is just a test.

$ cd test.git/
$ ls
branches  config  description  HEAD  hooks  info  objects  refs

$ touch git-daemon-export-ok

// Finally we add the repository name and author to the projects list file.
// This file is used by 'gitweb', and it's name is in '/etc/gitweb.conf'
// You must create the file the first time you create a new repository.
// Thereafter you simply add any new git projects to this file:
$ cd /git
$ touch projects_list_for_homegit
$ nano projects_list_for_homegit
$ cat projects_list_for_homegit
test MyFirstName+MyLastName

$ exitOne time only we set up the authorized keys file.
$ sudo -u git /bin/bash
$ cd
$ pwd
/home/git
$ mkdir .ssh
$ chmod go-rwx .ssh
$ touch .ssh/authorized_keys
$ chmod 600 .ssh/authorized_keys
Then for each new user whom we allow to use ssh access to git repositories we need to add their designated public ssh key.
// add public keys for allowed users, starting with yourself
$ nano .ssh/authorized_keys
$ tail -1 authorized_keys
ssh-rsa AAAAB3...6oLYnLx5d myname@somewhere.comThis is a list of command-line tools from console sessions in this guide. Each command is linked back to the chapter in which it was found. If a command can be found in more than one chapter then only the first chapter is linked.
Only Linux-provided commands are shown. Local commands used from local scripts are not included.
The shell scripts used to generate this list are detailed in my Getting Started With Pandoc Markdown project.
If any external URLs are linked in a chapter then they are displayed and linked below, organized by chapter name.
https://lists.ubuntu.com/mailman/listinfo/ubuntu-security-announce
https://en.wikipedia.org/wiki/Wayland_(protocol)#Wayland_compositors
https://www.tomshardware.com/best-picks/raspberry-pi-microsd-cards
https://ubuntu.com/tutorials/how-to-install-ubuntu-desktop-on-raspberry-pi-4#2-prepare-the-sd-card
https://downloads.raspberrypi.org/imager/imager_latest_amd64.deb
https://linuxconfig.org/ubuntu-server-tutorial-for-beginners
https://www.samba.org/samba/docs/current/man-html/vfs_fruit.8.html
https://raw.githubusercontent.com/deatrich/linux-home-server/main/examples/smb.conf
https://www.pishop.ca/product/ds3231-real-time-clock-module-for-raspberry-pi/
https://onlinux.systems/guides/20220524_how-to-disable-and-remove-snap-on-ubuntu-2204
https://docs.memset.com/cd/Linux%27s-OOM-Process-Killer.199066633.html
https://www.swissbit.com/en/products/security-products/secure-boot-solution/
https://github.com/deatrich/tools/blob/main/prime-ssh-keys.sh
https://threatpost.com/remote-desktop-protocol-secure/167719/
https://ubuntu.com/tutorials/access-remote-desktop#1-overview
https://www.zenarmor.com/docs/linux-tutorials/best-open-source-database-software
https://github.com/deatrich/tools/blob/main/etc/mysql-backup.conf
https://www.fosslinux.com/48755/top-opensource-virtualization-software-for-linux.htm
https://www.dedoimedo.com/computers/gparted.html#mozTocId133810
https://github.com/deatrich/tools/blob/main/system-backup.sh
https://github.com/deatrich/tools/blob/main/etc/system-backup.conf
https://www.techspot.com/guides/287-default-router-ip-addresses/
Ubuntu Advantage is also known as Ubuntu Pro. It is free of charge for personal use on up to 5 machines.↩︎
changes the mode of a file or directory. It takes symbolic or numeric arguments.↩︎
changes the owner of a file or directory; with a colon it also changes the group ownership.↩︎
Network Address Translation, used to hide internal device IP addresses from external devices↩︎
Domain Name System – how we look up hostnames↩︎